Wooden raised beds · Guide 26
Build a Braced Deep-Root Cedar Raised Bed
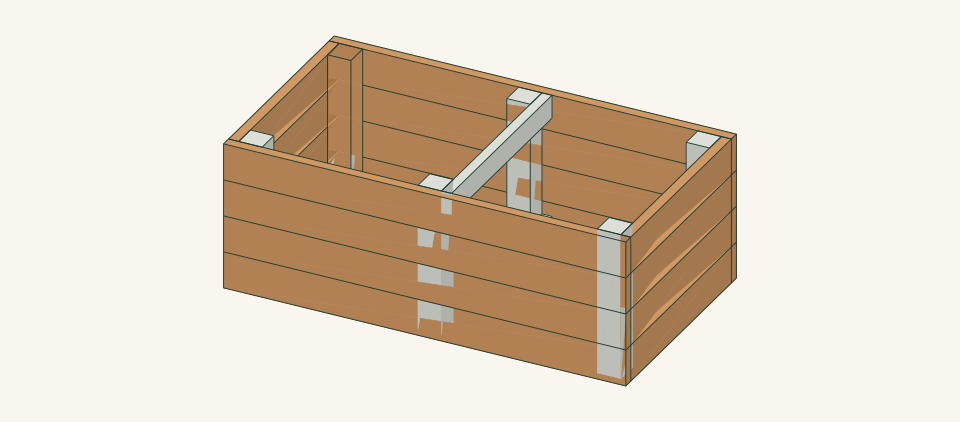
Build a 60 × 33 × 22-inch open-bottom cedar bed with corner posts, mid-wall posts and two cross ties that hold the long walls in for deep-rooted crops.
01 / See the shape
View the project
Loading the 3D view…
Drag to turn. Pinch or use + / − to zoom. The written step covers workholding and tool use.
Scroll or swipe the enlarged drawing to read its dimensions. Choose Fit to see the whole drawing again.
Build a Braced Deep-Root Cedar Raised Bed. Check the dimensions and build steps before cutting.
02 / Plan your build
Before you start
A deep bed carries more soil pressure than a low bed, so this design does not stack boards and hope the corners hold. Four 2×6 courses are screwed to 4×4 posts at every corner and at the middle of each long wall. Two cross ties join the mid-wall posts, one at ground level and one at the rim. The long walls then span only 23.25 inches between posts. The main failure comes from leaving out the mid posts or ties, filling before the ties are fixed, or filling above the 21-inch line. Any of these can bow a long wall or loosen its screws. No engineered load rating is given for the walls, so build it to these sizes, fill it in the three stages in step 11 and stop if a wall moves.
Where it goes
Level, well-drained native garden soil with 24 inches of clear access on every side and no buried services in the footprint. Do not place it on paving, a deck, a roof, a slope, or against a building or fence.
Footprint: 60 × 33 in bed, plus 24 in of clear working and reaching access on every side: about 108 × 81 in in total.
What to expect
Measure accurately, make supported square cuts, drill clamped joints and check a frame for square. Plan 6–8 hours for two people, including stock inspection, assembly and staged filling.
A planning estimate for the hands-on work, once the materials are bought and the tools are set up. It has not been timed on a finished build.
Check the spot
- Call 811 at least two working days before you dig or level the ground, and look for irrigation lines in the footprint.
- Check the 60 × 33-in footprint for level within 0.5 in in both directions, and for major roots and standing water.
- Confirm 24 in of access on every side and that runoff from the filled bed will not flow toward a building.
- Confirm the soil history. The open bottom does not separate roots from contaminated ground.
Stop and check first if…
- Stop if buried services, major roots, contamination or a slope over 0.5 in in the footprint cannot be resolved.
- Stop if the measured stock differs from 1.5 × 5.5, 3.5 × 3.5 or 1.5 × 3.5 in. Different stock changes the cut lengths and screw lines, so work them out again before you cut.
- Stop if the selected screw's pilot or edge-distance requirements cannot be met at the stated screw lines.
- Stop filling if a long wall bows more than 1/8 in from the straightedge, a joint opens or the frame shifts. Remove soil from that side before any repair.
- Do not fill before both T ties are fixed. Do not build this bed taller or longer: the posts, ties and screw spacing are sized for this one.
Work safely
- Clamp and support the 4×4 stock on both sides of every cut. Keep the saw guard working and never hold a short post freehand near the blade.
- Clamp every board to its post before drilling. A caught bit can spin an unsecured 60-in board.
- Lift the walls and the empty frame with two people, holding the posts, never a single board. Do not move the frame once soil is in it.
- Keep hands out of the corner gap while fitting E between the long walls.
Budget
We have not put a price on this one yet. Lumber and hardware prices change by store and season, so price the list under What you need at your local supplier before you buy.
03 / Gather and cut
What you need
L — Long wall board
8 pieces
Western red cedar 2×6, surfaced four sides; actual 1.5 × 5.5 in. Eight 2×6 × 8-ft boards, shared with part E. Each 96-in board yields one 60-in L and one 30-in E: 0.5 trim + 60 + 0.125 kerf + 30 + 0.125 kerf = 90.75 in, leaving a 5.25-in offcut.
Measure thickness and width at both ends and the middle. Reject boards with through-cracks, loose knots in the middle 24 in, or more than 0.25 in of bow.
E — End wall board
8 pieces
Western red cedar 2×6, surfaced four sides; actual 1.5 × 5.5 in. Cut from the same eight 2×6 × 8-ft boards as part L, one E per board.
E fits between the long walls. Check that 30 in plus two measured L thicknesses equals the 33-in outside depth before cutting all eight.
C — Corner post
4 pieces
Western red cedar 4×4, surfaced; actual 3.5 × 3.5 in. Two 4×4 × 8-ft posts, shared with part M. Each 96-in post yields three 22-in pieces: 0.5 trim + 3 × 22 + 3 × 0.125 kerf = 66.875 in, leaving a 29.125-in offcut.
Check that both ends are cut square and that the post is not twisted. Heartwood is preferred because the posts stand in soil.
M — Mid-wall post
2 pieces
Western red cedar 4×4, surfaced; actual 3.5 × 3.5 in. Cut from the same two 4×4 × 8-ft posts as part C.
Choose the two straightest 22-in pieces for M. The ties fasten into their side faces.
T — Cross tie
2 pieces
Western red cedar 2×4, surfaced; actual 1.5 × 3.5 in. One 2×4 × 8-ft board: 0.5 trim + 2 × 30 + 2 × 0.125 kerf = 60.75 in, leaving a 35.25-in offcut.
Cut both ties from straight, knot-free sections. The ends must be square so each tie fits snugly between the long walls.
Wall screws
80 items
#10 × 3 in stainless steel exterior wood screws Purchase at least 80 plus spares. Keep the spares separate from the installed count.
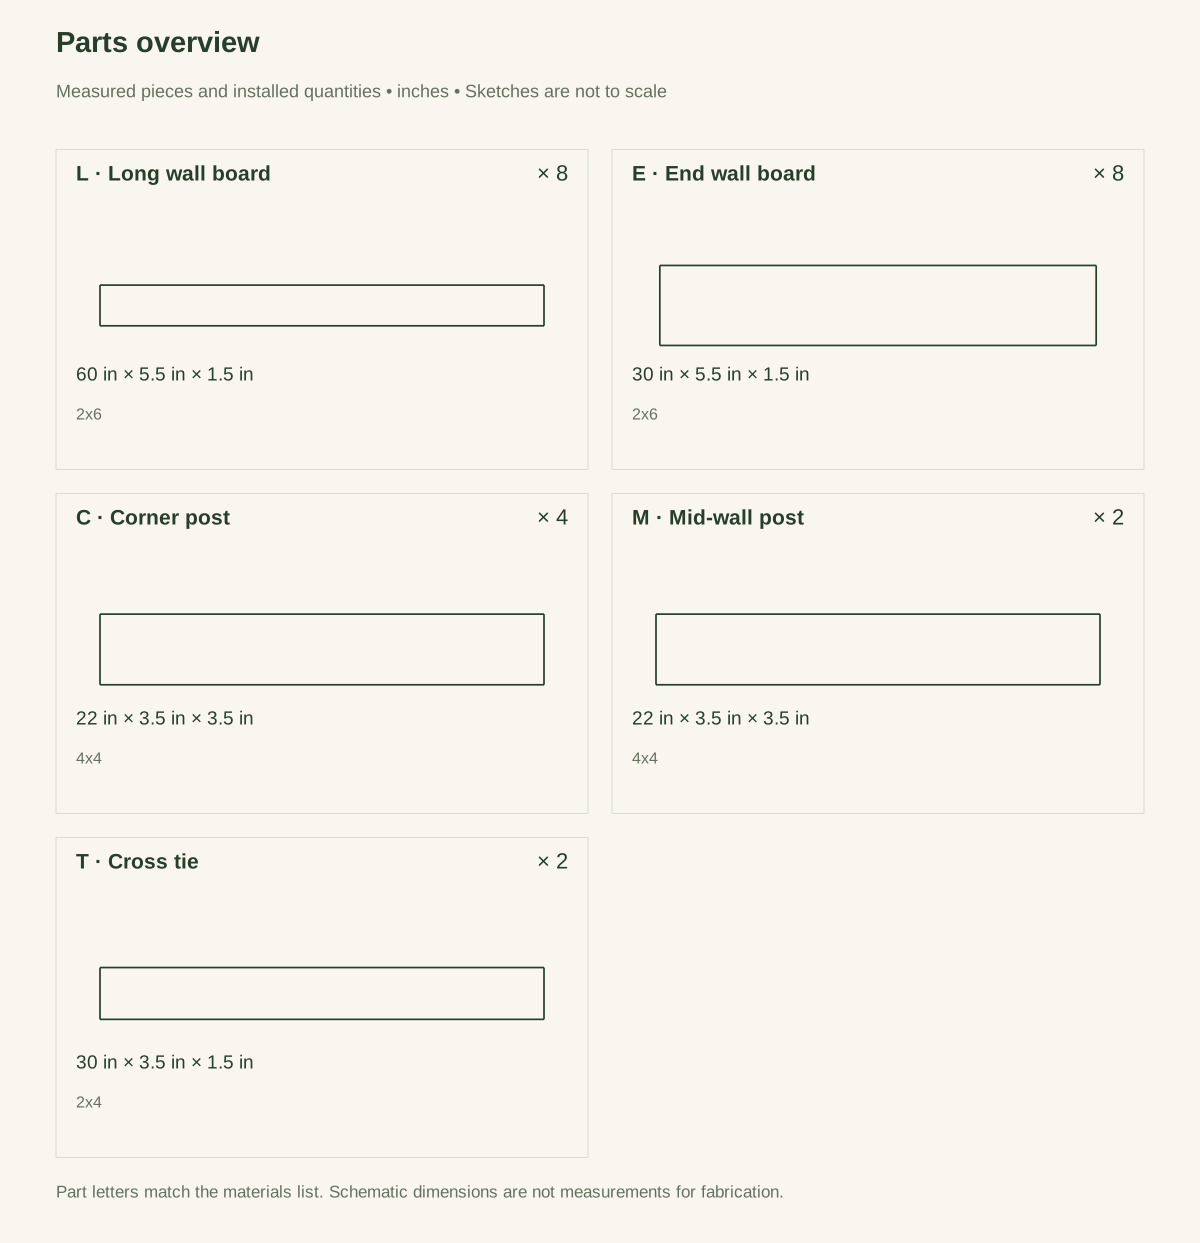
Two per board at each post: 32 L to C, 16 L to M, 32 E to C. Drill pilot holes to the screw maker's size and drive the heads flush, not below the surface.
Tie screws
8 items
#10 × 3 in stainless steel exterior wood screws, same product as the wall screws Purchase at least 8 plus spares.
Two through each end of each T into the side face of M. Use the same exterior screw as the walls.
Cut list
| Piece | How many | Cut length | Note |
|---|---|---|---|
| L — Long wall board | 8 | 60 × 5.5 × 1.5 in | Finished length × width × thickness; square ends unless the detail says otherwise. |
| E — End wall board | 8 | 30 × 5.5 × 1.5 in | Finished length × width × thickness; square ends unless the detail says otherwise. |
| C — Corner post | 4 | 22 × 3.5 × 3.5 in | Finished length × width × thickness; square ends unless the detail says otherwise. |
| M — Mid-wall post | 2 | 22 × 3.5 × 3.5 in | Finished length × width × thickness; square ends unless the detail says otherwise. |
| T — Cross tie | 2 | 30 × 3.5 × 1.5 in | Finished length × width × thickness; square ends unless the detail says otherwise. |
Tools
- Tape measure, combination square, framing square and sharp pencil
- 4-ft level and a straight 36-in straightedge
- Guarded saw suited to 4×4 stock, with sawhorses supporting both sides of each cut
- Drill/driver with bits matched to the selected screw
- At least four bar clamps with 36-in or greater capacity
- Shovel, wheelbarrow or bags, and a watering hose
Protective gear
- Eye protection during cutting and drilling
- Hearing protection and a dust mask suited to the saw and cedar dust
- Work gloves for handling rough stock, removed near rotating cutters
- Closed-toe footwear for lifting posts and the assembled frame
04 / Put it together
Build steps
- 01
Check the site and buried services
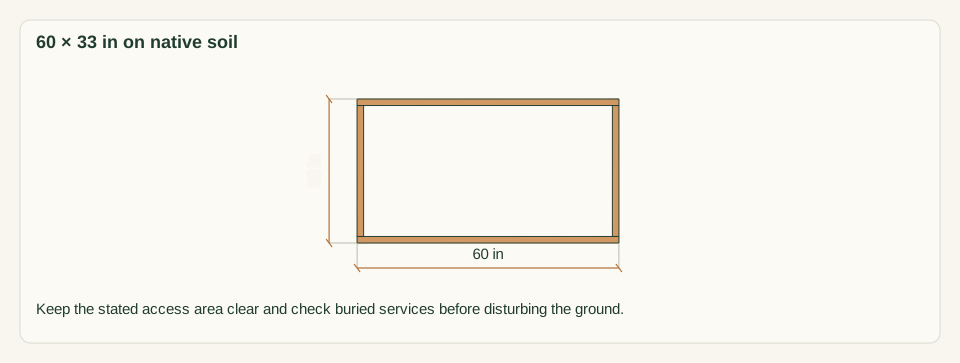
Mark a 60 × 33-in rectangle on native soil with 24 in of clear access on every side. Call 811 at least two working days before you dig or level the ground, and look for irrigation lines. Lay a level across the 60-in length and the 33-in width.
Close-up · Whole model shows the complete part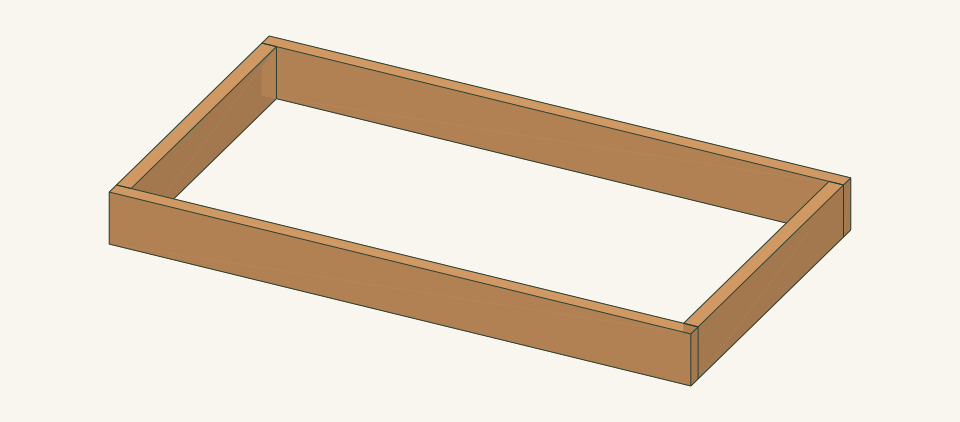
Loading the 3D view…
Drag to turn. Pinch or use + / − to zoom. The written step covers workholding and tool use.
Scroll or swipe the enlarged drawing to read its dimensions. Choose Fit to see the whole drawing again.
Mark the actual ground footprint before preparing the soil. This is a site layout, not an assembled-bed instruction.
Check: No services or major roots are in the footprint. Neither direction falls more than 0.5 in. If either check fails, stop and choose another site.
- 02
Measure and inspect the stock
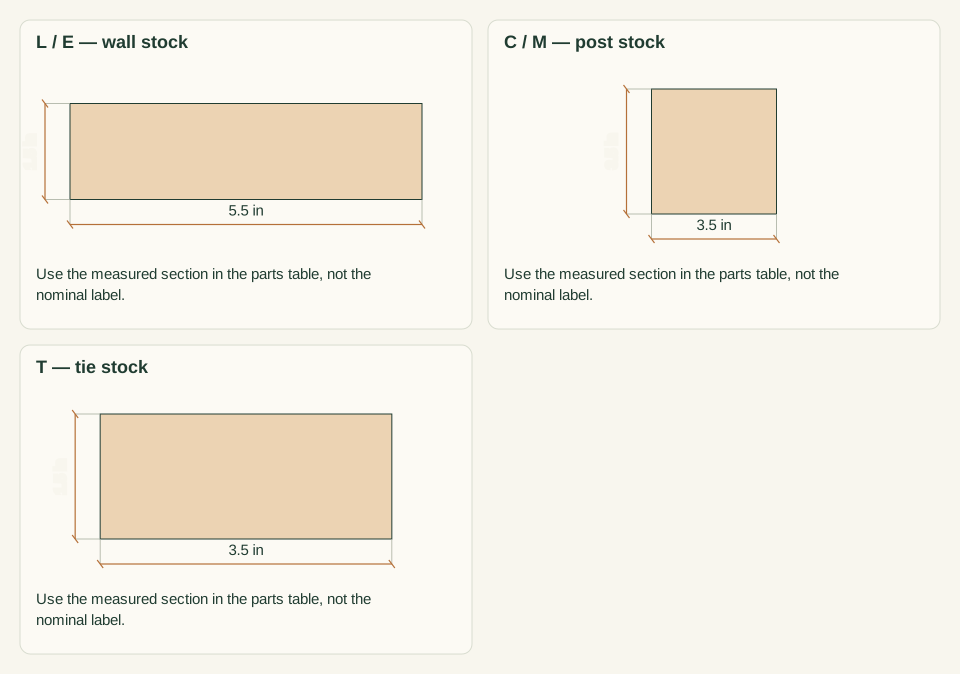
Measure the eight 2×6 × 8-ft boards at both ends and the middle. Do the same for the two 4×4 × 8-ft posts and the one 2×4 × 8-ft board. The design requires 1.5 × 5.5, 3.5 × 3.5 and 1.5 × 3.5 in. Reject split, twisted or badly bowed pieces.
Close-up · Whole model shows the complete part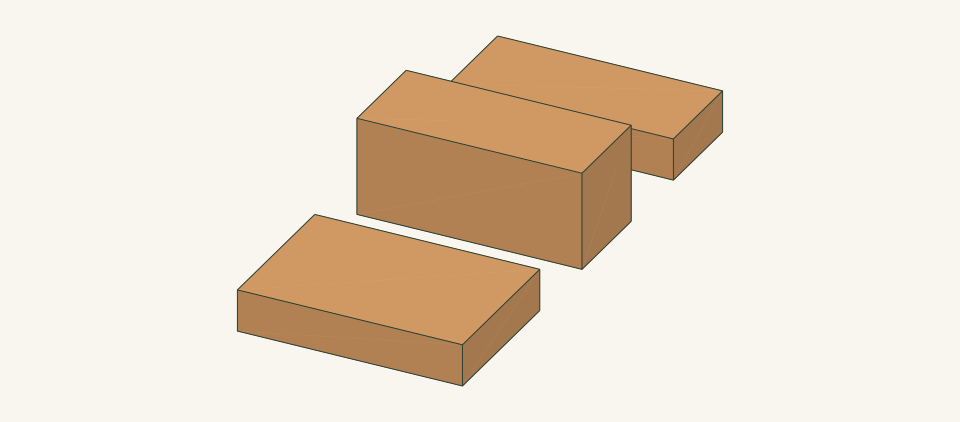
Loading the 3D view…
Drag to turn. Pinch or use + / − to zoom. The written step covers workholding and tool use.
Scroll or swipe the enlarged drawing to read its dimensions. Choose Fit to see the whole drawing again.
Compare the three measured stock sections. Short display samples are not finished cut lengths.
Check: Every piece matches its actual section within 1/16 in. If it does not, stop: different stock changes the cut lengths.
- 03
Cut the wall boards L and E
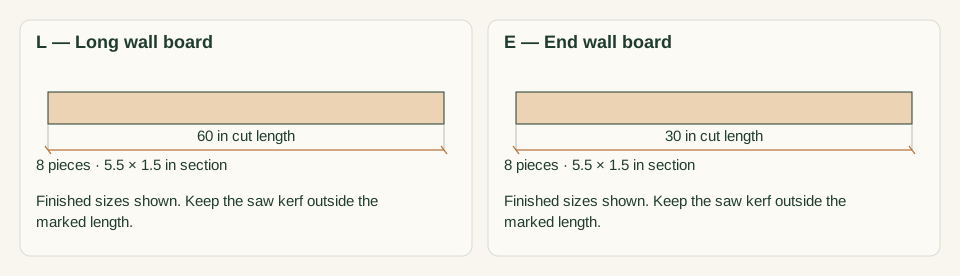
On each 2×6, square one end with a 0.5-in trim cut. Cut one 60-in L, then one 30-in E, keeping the kerf on the waste side. Support both sides of each cut so the offcut is not trapped.
Close-up · Whole model shows the complete part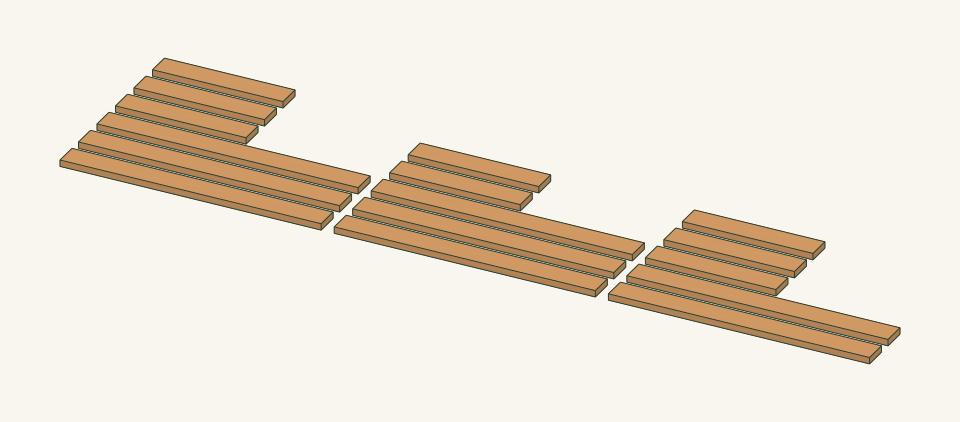
Loading the 3D view…
Drag to turn. Pinch or use + / − to zoom. The written step covers workholding and tool use.
Scroll or swipe the enlarged drawing to read its dimensions. Choose Fit to see the whole drawing again.
Cut eight long boards and eight end boards; keep the boards loose while labeling them.
Check: Eight L at 60 in and eight E at 30 in. Like parts match within 1/32 in when compared face to face.
- 04
Cut posts C and M and ties T
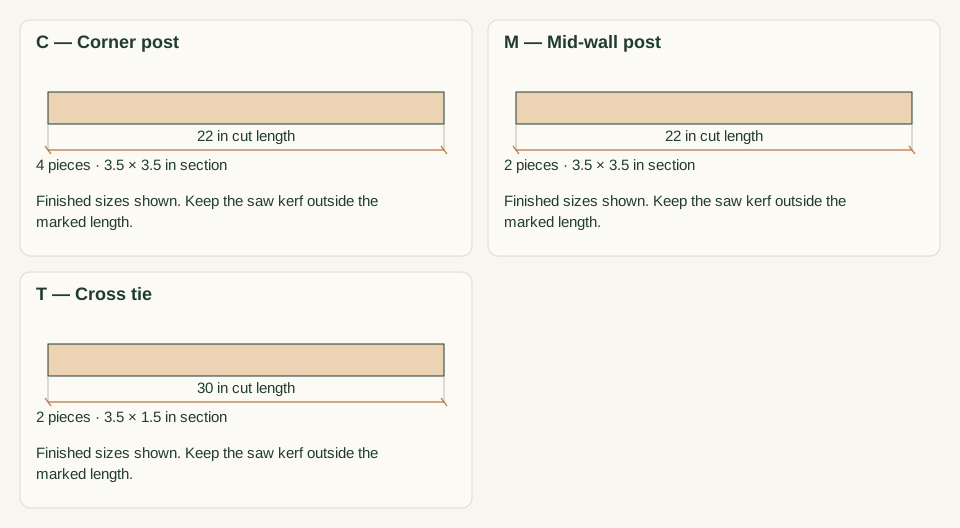
Trim one end of each 4×4 square. Cut three 22-in pieces from each post. Pick the two straightest pieces for M and use the other four for C. Trim the 2×4 and cut two 30-in T ties. Clamp the heavy post stock on a stable support.
Close-up · Whole model shows the complete part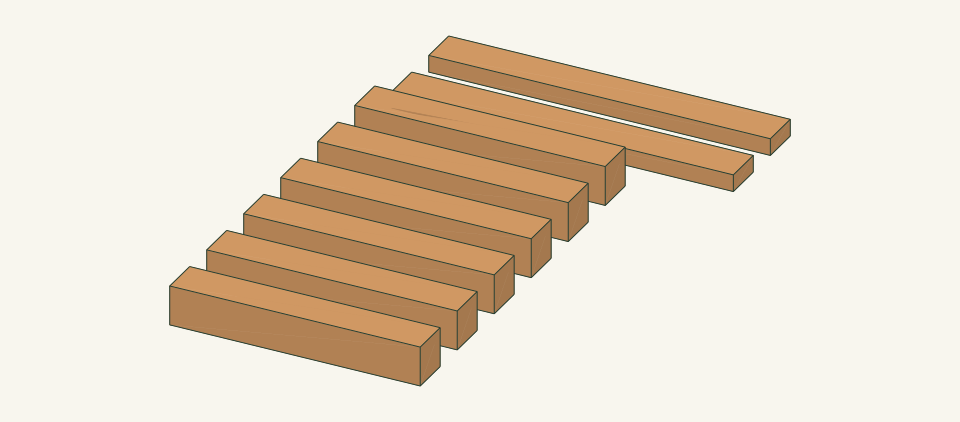
Loading the 3D view…
Drag to turn. Pinch or use + / − to zoom. The written step covers workholding and tool use.
Scroll or swipe the enlarged drawing to read its dimensions. Choose Fit to see the whole drawing again.
Cut six matching posts and two cross ties. C and M share a size but have different positions.
Check: Six 22-in posts and two 30-in ties are cut. Every end is square when checked with a square.
- 05
Mark the screw lines
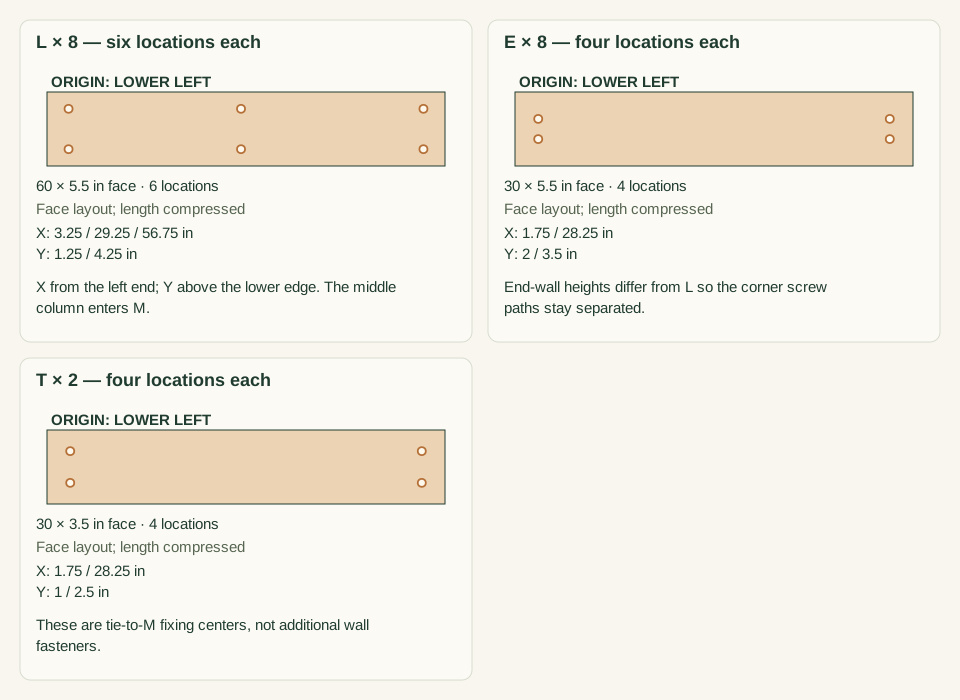
Mark the outside face of each L. Draw screw lines 3.25 in from each end and 29.25 in from the left end. Mark holes 1.25 and 4.25 in above the bottom edge. On each E, draw lines 1.75 in from each end with holes at 2.0 and 3.5 in. On each T, mark holes 1.75 in from each end at 1.0 and 2.5 in above the bottom edge.
Close-up · Whole model shows the complete part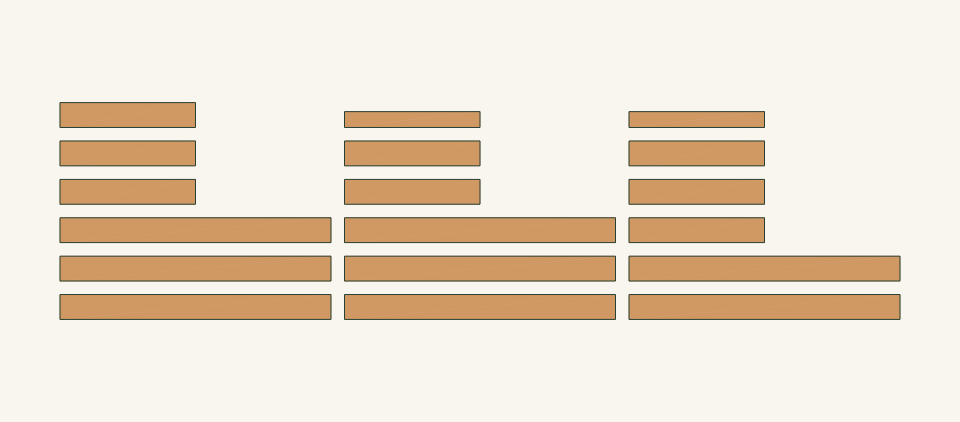
Loading the 3D view…
Drag to turn. Pinch or use + / − to zoom. The written step covers workholding and tool use.
Scroll or swipe the enlarged drawing to read its dimensions. Choose Fit to see the whole drawing again.
Mark 88 source fixing centers on the loose wall boards and ties. Rows are measured from each board bottom.
Check: Each L has 6 marks, each E has 4 marks and each T has 4 marks. All marks are measured from the stated ends and edges.
- 06
Build the front and back long walls
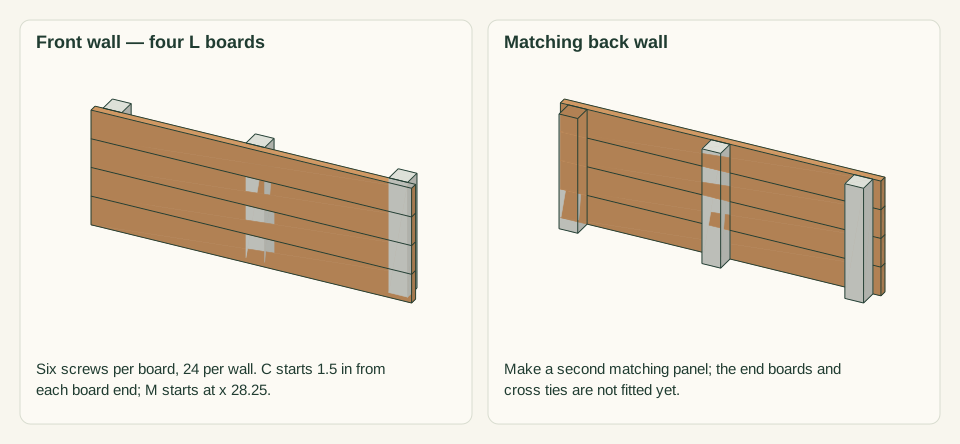
Lay two C and one M flat on a level surface. Lay four L across them with the outside face up and the bottom L flush with the post ends. Set the C posts 1.5 in in from each L end. Set M with its left face 28.25 in from the left L end. Clamp each board, drill pilot holes to the screw maker's size and drive 6 screws per board. Repeat for the back wall.
Close-up · Whole model shows the complete part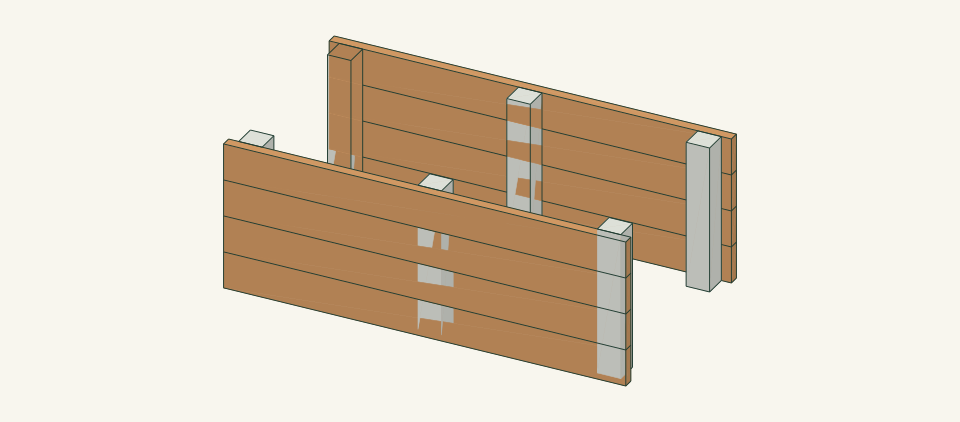
Loading the 3D view…
Drag to turn. Pinch or use + / − to zoom. The written step covers workholding and tool use.
Scroll or swipe the enlarged drawing to read its dimensions. Choose Fit to see the whole drawing again.
Build the two long-wall panels first. Each group of four L boards bears on two C posts and one M post.
Check: Each wall is 22 in tall with the posts flush top and bottom. Each wall has 24 screws and no split post or board.
- 07
Stand the walls and fit the ends
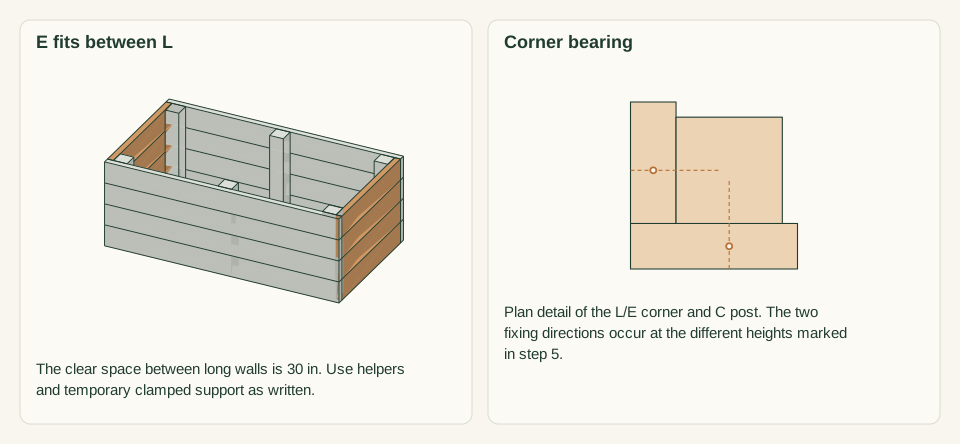
With two helpers, stand both long walls on a flat surface with the posts facing inward and the walls 30 in apart inside. Clamp a scrap board across the top of each end to hold the walls upright until the first E boards are fixed. Fit four E between the L ends at each end, course by course, against the C post faces. Clamp, drill and drive 4 screws per E.
Close-up · Whole model shows the complete part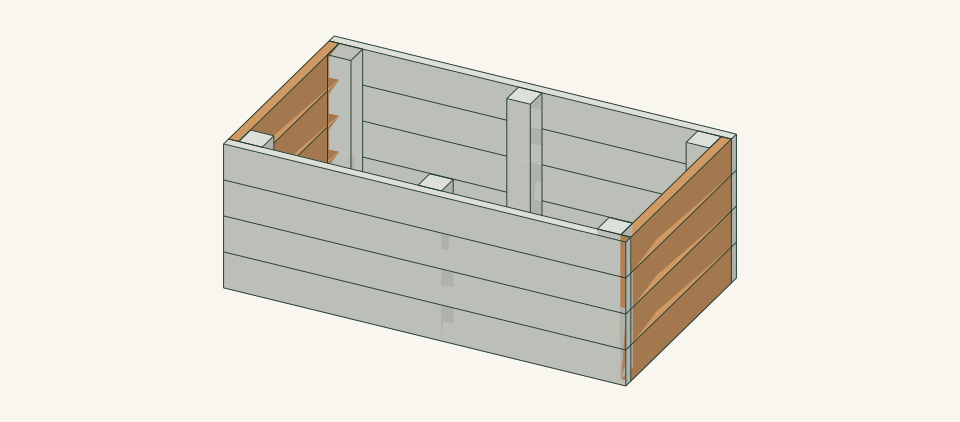
Loading the 3D view…
Drag to turn. Pinch or use + / − to zoom. The written step covers workholding and tool use.
Scroll or swipe the enlarged drawing to read its dimensions. Choose Fit to see the whole drawing again.
Add the eight end boards between the long walls. The warm boards are E; the long-wall panels remain context.
Check: E faces are flush with the L ends, and the courses are level across each corner. All 32 E screws are seated.
- 08
Square the frame and fix ties T
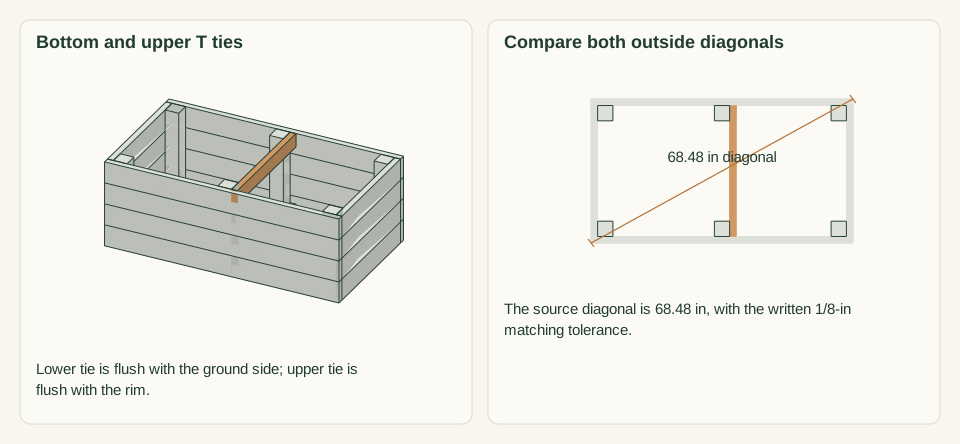
Measure both outside diagonals and adjust to 68.48 in each, matching within 1/8 in. Fit the bottom T against the right face of both M posts, flush with the ground side. Fit the top T flush with the rim. Clamp each tie and drive 2 screws through each tie end into M.
Close-up · Whole model shows the complete part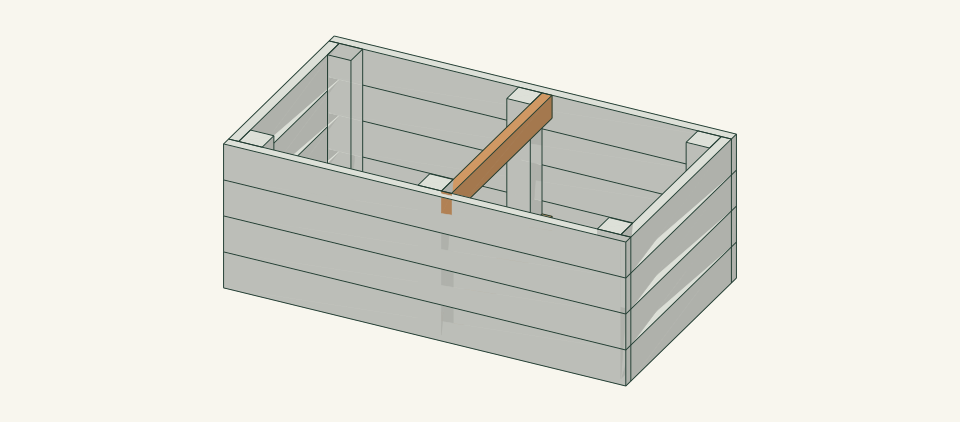
Loading the 3D view…
Drag to turn. Pinch or use + / − to zoom. The written step covers workholding and tool use.
Scroll or swipe the enlarged drawing to read its dimensions. Choose Fit to see the whole drawing again.
Square the complete frame, then add both cross ties against the right faces of M.
Check: Both diagonals match within 1/8 in. Both ties are snug between the walls and all 8 tie screws are seated.
- 09
Inspect every connection before soil
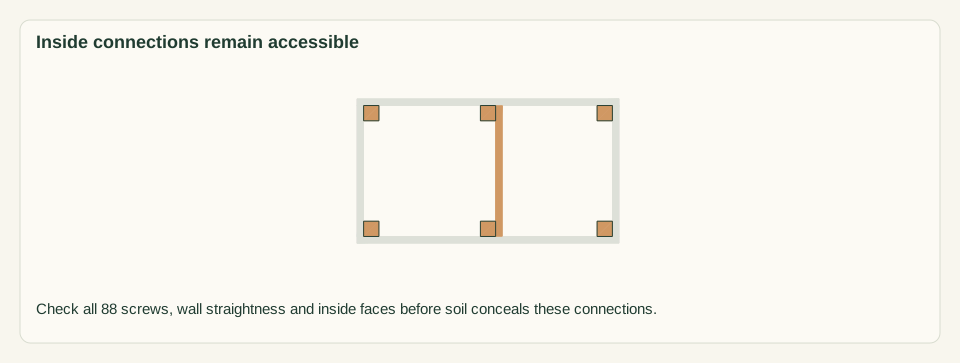
Release all clamps. Check all 88 screws for seated heads, stripped holes and splits. Run a hand along each inside face for projecting points. Check that each long wall is straight within 1/8 in along a straightedge laid between C and M.
Close-up · Whole model shows the complete part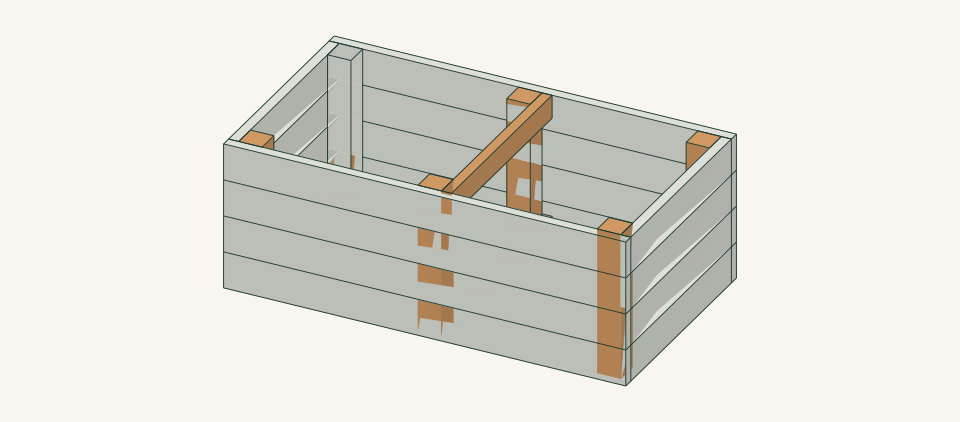
Loading the 3D view…
Drag to turn. Pinch or use + / − to zoom. The written step covers workholding and tool use.
Scroll or swipe the enlarged drawing to read its dimensions. Choose Fit to see the whole drawing again.
Before filling, inspect the posts, wall attachments and both ties. The structural assembly is complete; soil has not been added.
Check: No defect remains. A split post, board or tie is replaced now, while every joint is still visible.
- 10
Place the empty frame on the site
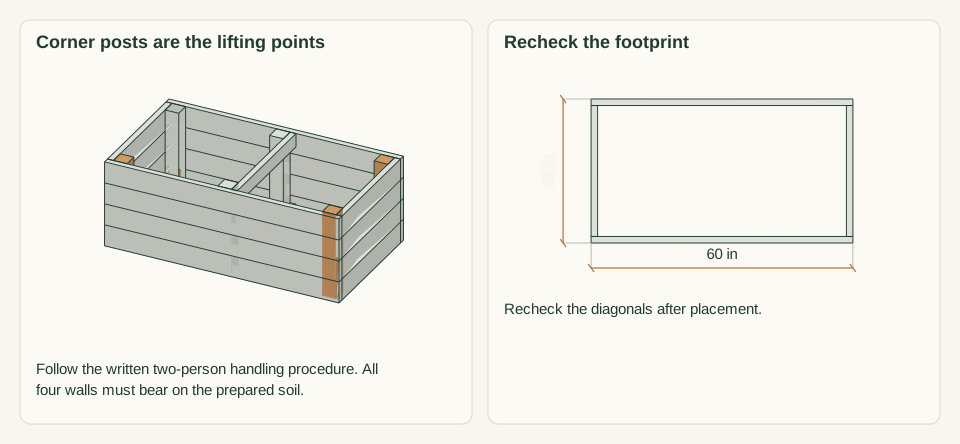
With two people, lift the empty frame by the corner posts. Do not lift it by one wall or drag it. Set it inside the marked 60 × 33-in rectangle and check that all four walls bear on the soil. Recheck the diagonals at 68.48 in.
Close-up · Whole model shows the complete part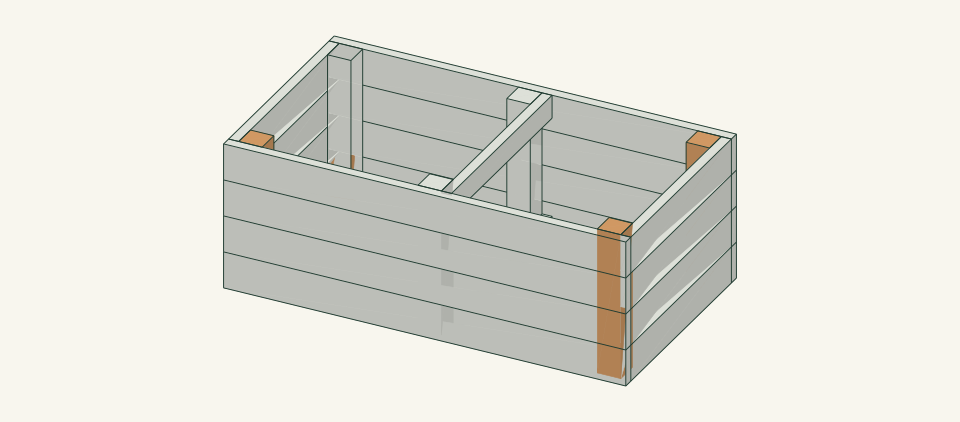
Loading the 3D view…
Drag to turn. Pinch or use + / − to zoom. The written step covers workholding and tool use.
Scroll or swipe the enlarged drawing to read its dimensions. Choose Fit to see the whole drawing again.
Move only the empty frame, lifting at the corner posts rather than pulling a wall.
Check: The frame does not rock, the bottom courses touch soil along their length, and the diagonals still match.
- 11
Fill in three stages and watch the walls
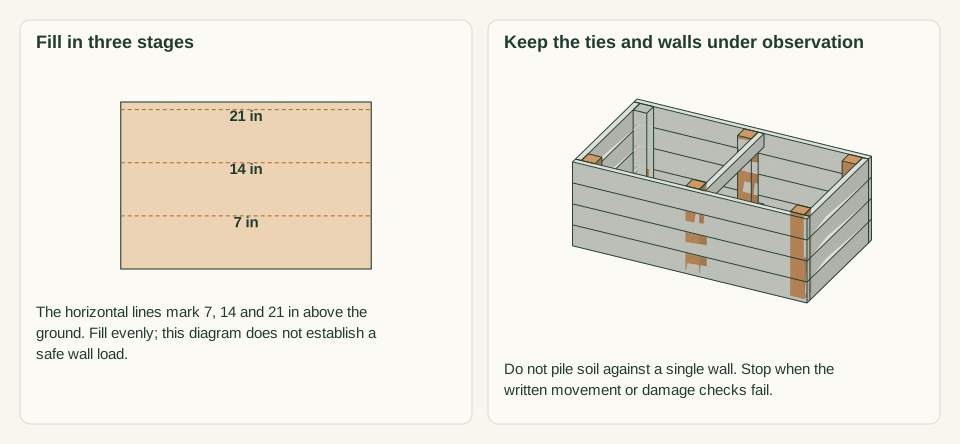
Mark lines 7, 14 and 21 in above the ground on the inside faces. Fill to the 7-in line, spreading the soil evenly rather than dumping it against one wall. Water lightly and check the walls. Repeat to 14 in, then to 21 in, about 19.73 cu ft of settled mix in total.
Close-up · Whole model shows the complete part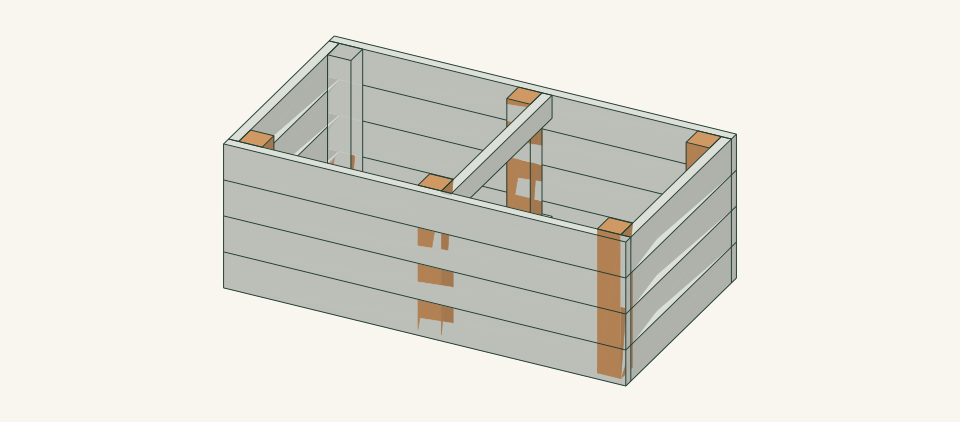
Loading the 3D view…
Drag to turn. Pinch or use + / − to zoom. The written step covers workholding and tool use.
Scroll or swipe the enlarged drawing to read its dimensions. Choose Fit to see the whole drawing again.
Use the marked fill levels, inspecting the walls after each stage rather than adding the full batch at once.
Check: After each stage, both long walls stay within 1/8 in of a straightedge laid between C and M. Stop for any bowing, opening joint or movement.
- 12
Water, settle and make the final check
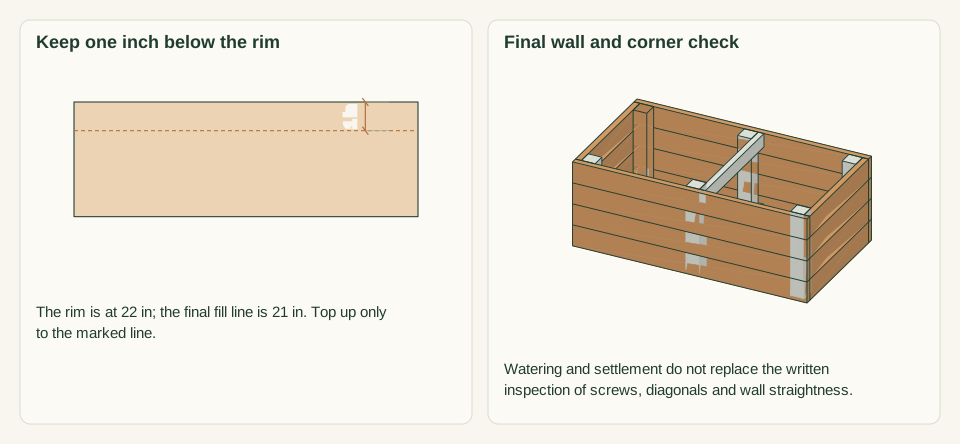
Water the full bed thoroughly and let it drain. Check the soil surface against the 21-in line and top it up only to that line. Recheck the diagonals, the wall straightness and the screw heads at the C and M posts.
Close-up · Whole model shows the complete partLoading the 3D view…
Drag to turn. Pinch or use + / − to zoom. The written step covers workholding and tool use.
Scroll or swipe the enlarged drawing to read its dimensions. Choose Fit to see the whole drawing again.
After watering, compare the settled level with the 21-in mark and inspect the rim and connections again.
Check: The soil sits at 21 in with 1 in of freeboard. Water drains within the day, and no wall, post or tie has moved.


05 / Keep it sound
Care
After the build
- Fill in the three stages marked at 7, 14 and 21 in, checking the walls after each stage. Use a mix suited to deep-rooted crops, and match crop spacing to the plants.
- Inspect the walls, posts and ties after the first deep watering and again after one week of use before planting deep-rooted crops.
Check it each season
- Each season, lay a straightedge between C and M on both long walls. Record any bow over 1/8 in and stop adding soil if it grows.
- Check screw heads at the corners and mid posts, and the top tie, for corrosion or withdrawal. Replace a split or softened board or post rather than adding screws beside the damage.
- Keep the soil at or below the 21-in line. Remove soil from one side before opening any joint.
If something looks wrong
- Long wall bows between posts
- Stop filling, remove soil from that side, and check the L-to-M screws and the T-to-M screws before any repair.
- Corner opens at the top course
- Stop, unload the corner, and inspect the E-to-C screws for stripping or a split post. Replace the damaged part.
- Frame rocks on site
- Lift the empty frame off, correct high spots on the checked site, and reset it. Do not wedge it with scraps.
- Water stays pooled on the surface
- Stop watering and check for compacted native soil or an unsuitable mix. Do not drill outlets in the walls.
- Tie screws loosen or the tie splits
- Unload the bed to below the bottom tie, replace T with new screws in fresh wood, and check the joint again before refilling.
Keep exploring