Garden workstations · Guide 72
Build a Non-Electrical Seedling Rack
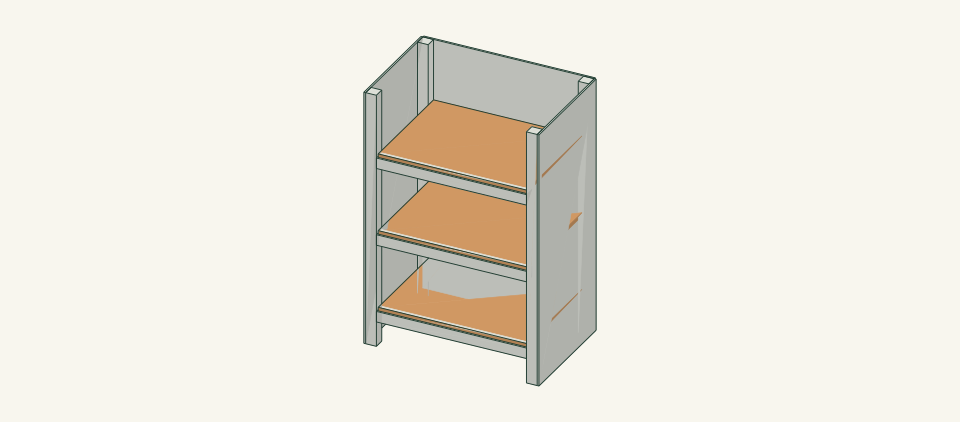
Three ventilated shelves for removable seed trays, with a solid rear brace and a restraint for the chosen wall.
01 / See the shape
View the project
Loading the 3D view…
Drag to turn. Pinch or use + / − to zoom. The written step covers workholding and tool use.
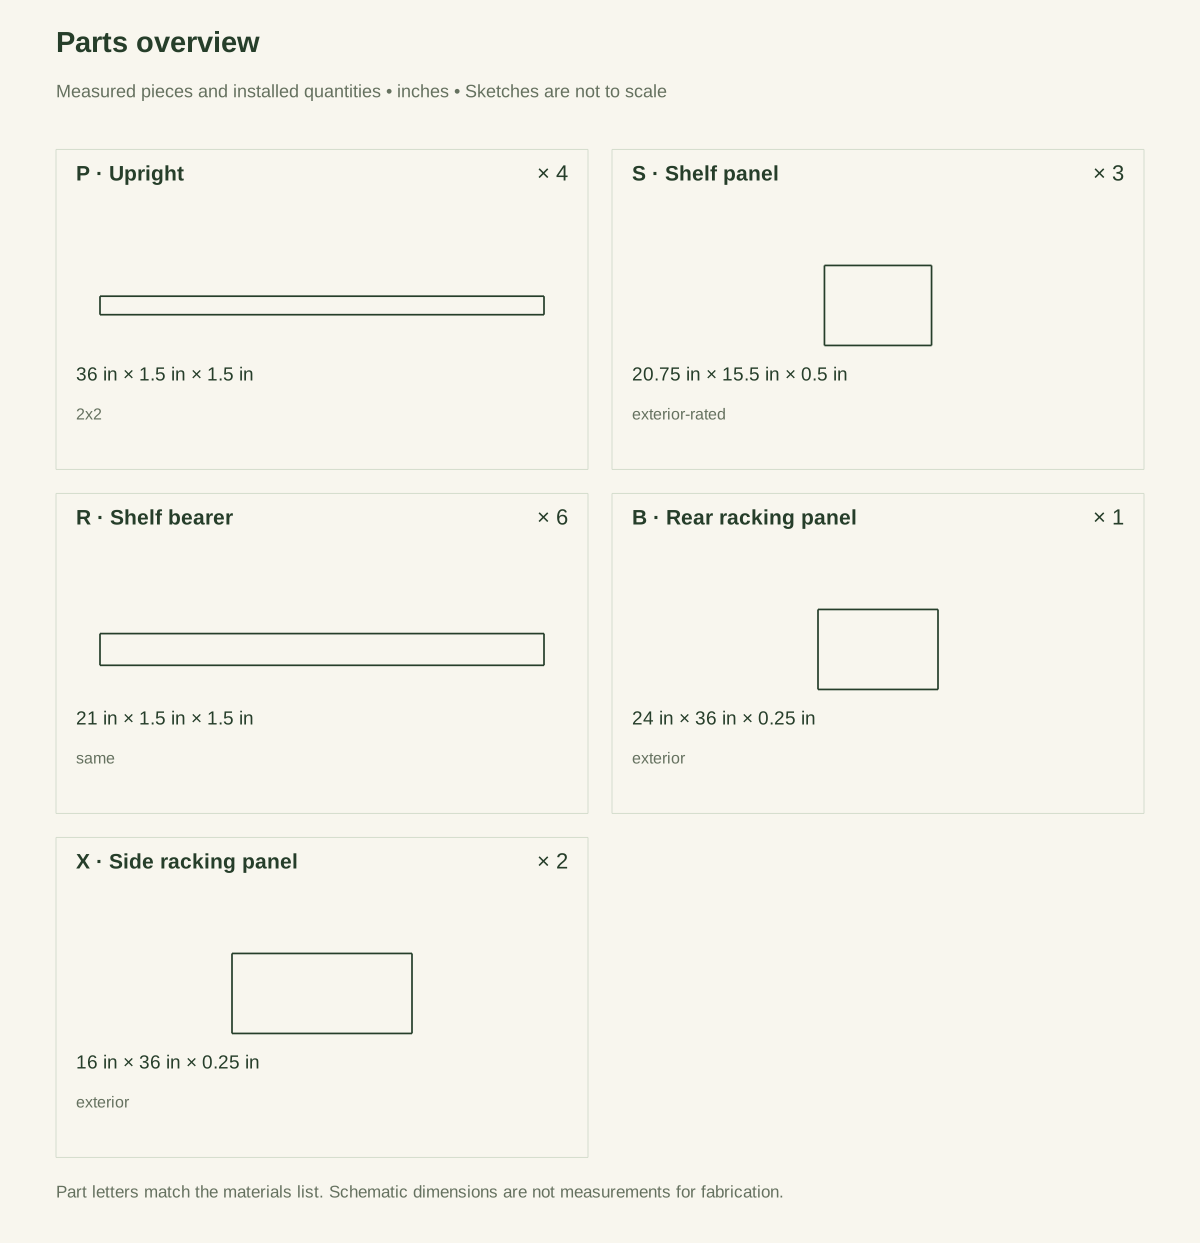
Scroll or swipe the enlarged drawing to read its dimensions. Choose Fit to see the whole drawing again.
Build a Non-Electrical Seedling Rack. Check the dimensions and build steps before cutting.
02 / Plan your build
Before you start
This rack organizes small seed trays without wiring, heaters or lights. Three rectangular shelves slide through the open front for cleaning. The rear and side panels keep the frame square, and two appropriate wall restraints secure the rack to verified framing. Use catch trays, keep heavier wet trays low and remove trays before sliding a shelf.
Where it goes
A dry, level sheltered floor beside a suitable timber-stud wall; no balcony edge, public use or electrical equipment.
Footprint: 24.5 × 16.25 in frame size; allow room around it to work and for anything that projects.
What to expect
Measure accurately, make supported square cuts and drill clamped joints. Plan 5–6 hours plus wall-location checks.
A planning estimate for the hands-on work, once the materials are bought and the tools are set up. It has not been timed on a finished build.
Check the spot
- A dry, level sheltered floor beside a suitable timber-stud wall; no balcony edge, public use or electrical equipment.
- Measure the usable stock before marking. Keep the assembly area flat and large enough to clamp the work without reaching across a moving cutter.
Stop and check first if…
- Stop if a part splits, a fixing strips, or the assembled object rocks. Unload it before opening a joint.
- Do not substitute an unknown material section or make the object taller or wider without checking every affected part and joint.
Work safely
- Fit both selected wall restraints before adding trays. Check for hidden pipes and wiring before any wall drilling; do not use unknown wall anchors.
- Take trays elsewhere to water and return them after draining. Keep electrical lights, heaters and trailing leads off this non-electrical rack. Remove all trays before sliding a shelf or moving the empty rack.
Budget
We have not put a price on this one yet. Lumber and hardware prices change by store and season, so price the list under What you need at your local supplier before you buy.
03 / Gather and cut
What you need
P — Upright
4 pieces
Untreated surfaced 2 × 2, actual 1.5 square. Two 2 × 2 × 8-ft boards, two 36-inch pieces per board.
Measure your boards before cutting. Build to the finished sizes written here, not the nominal lumber label.
S — Shelf panel
3 pieces
Exterior-rated plywood, actual 0.5 in. Buy one 48 × 48 × 0.5-inch plywood panel; one 20.75-inch-wide strip yields three 15.5-inch shelf depths with kerf and trimming.
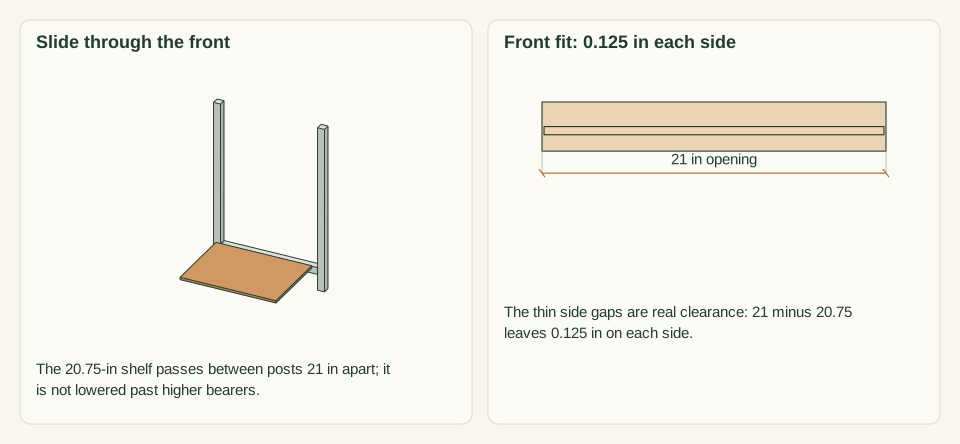
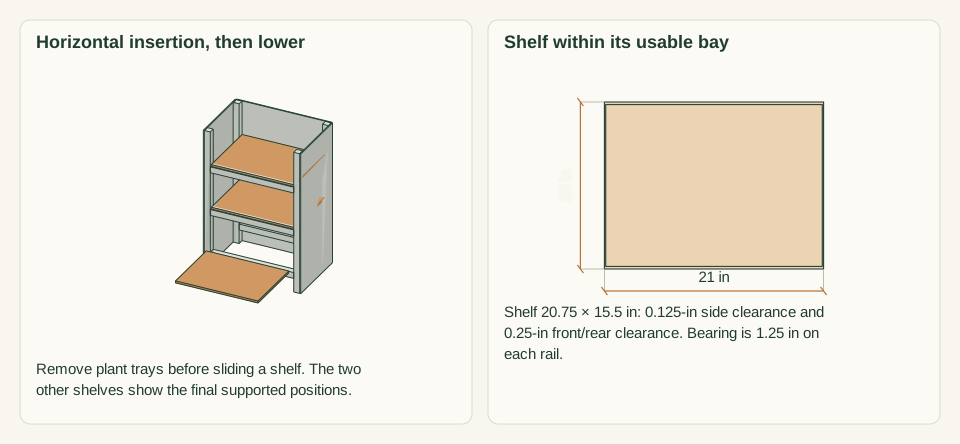
Rectangular shelves slide through the 21-inch front opening with 1/8-inch clearance each side; no corner notches.
R — Shelf bearer
6 pieces
Same 1.5-square stock. Two 2 × 2 × 8-ft boards, three 21-inch bearers per board.
Measure your boards before cutting. Build to the finished sizes written here, not the nominal lumber label.
B — Rear racking panel
1 piece
Exterior plywood, actual 0.25 in. Buy one 48 × 96 × 0.25-inch plywood sheet for the 24 × 36 back and both 16 × 36 side panels; allow kerf and trim.
Measure your boards before cutting. Build to the finished sizes written here, not the nominal lumber label.
X — Side racking panel
2 pieces
Exterior plywood, actual 0.25 in. Cut both side panels from the sheet listed for B; no second sheet needed.
Required to couple front and rear faces; not optional decorative cladding.
Bearer screws
24 items
#10 × 2.5 in exterior wood screws Purchase at least 24; keep spare hardware separate from the installed count.
Use one consistent product and follow its pilot and driving instructions.
Rear panel screws
18 items
#6 × 1 in exterior wood screws Purchase at least 18; keep spare hardware separate from the installed count.
Use one consistent product and follow its pilot and driving instructions.
Tip restraint
2 items
Two manufacturer-rated furniture restraints with screws appropriate to identified timber studs and the rack uprights Buy two complete furniture-restraint sets suitable for these upright sizes and verified timber-stud locations; include the maker’s specified fixings.
Follow the restraint instructions; no drywall-only anchors and no hand-push test substitutes for restraint selection.
Side-panel screws
24 items
#6 × 1-in exterior screws Purchase at least 24; keep spare hardware separate from the installed count.
Twelve per side into the front and rear uprights only, at the heights in step 7.
Cut list
| Piece | How many | Cut length | Note |
|---|---|---|---|
| P — Upright | 4 | 36 × 1.5 × 1.5 in | Finished length × width × thickness; square ends unless the detail says otherwise. |
| S — Shelf panel | 3 | 20.75 × 15.5 × 0.5 in | Finished length × width × thickness; square ends unless the detail says otherwise. |
| R — Shelf bearer | 6 | 21 × 1.5 × 1.5 in | Finished length × width × thickness; square ends unless the detail says otherwise. |
| B — Rear racking panel | 1 | 24 × 36 × 0.25 in | Finished length × width × thickness; square ends unless the detail says otherwise. |
| X — Side racking panel | 2 | 16 × 36 × 0.25 in | Finished length × width × thickness; square ends unless the detail says otherwise. |
Tools
- Tape or rule, square and sharp pencil
- Clamps, a flat bench and sacrificial backing
- Suitable guarded saw for the specified stock
- Drill/driver, depth stop and bits matched to the chosen screws
- Fine abrasive and a dust brush
- Countersink bit; drill guide and depth stop; suitable wall-location and restraint installation tools
Protective gear
- Eye protection during cutting and drilling
- Hearing protection and dust collection appropriate to the actual tools
- Closed footwear; keep loose clothing and gloves away from rotating cutters
04 / Put it together
Build steps
- 01
Choose trays and the restraint location
Measure each seed tray together with its catch tray. The shelf surface is 20.75 × 15.5 inches, not the full outside rack size. Choose small trays that fit without overhang and leave hand room. Identify suitable timber-stud wall positions for two matching furniture restraints before cutting.
Close-up · Whole model shows the complete part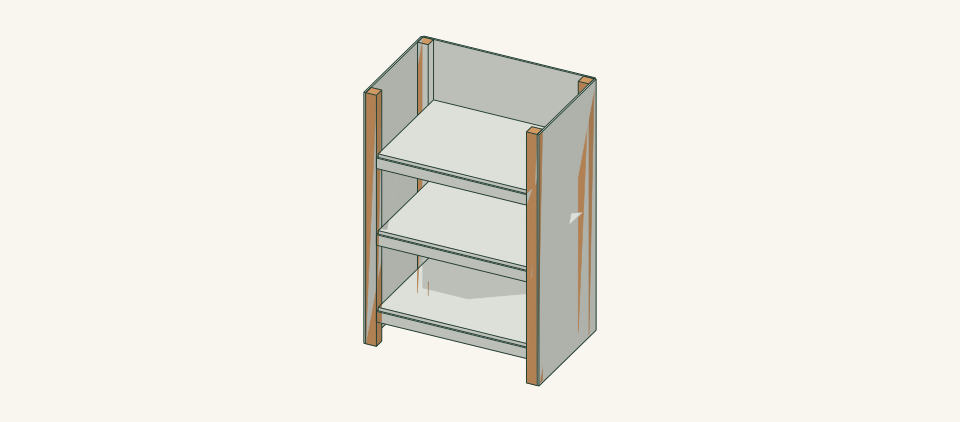
Loading the 3D view…
Drag to turn. Pinch or use + / − to zoom. The written step covers workholding and tool use.
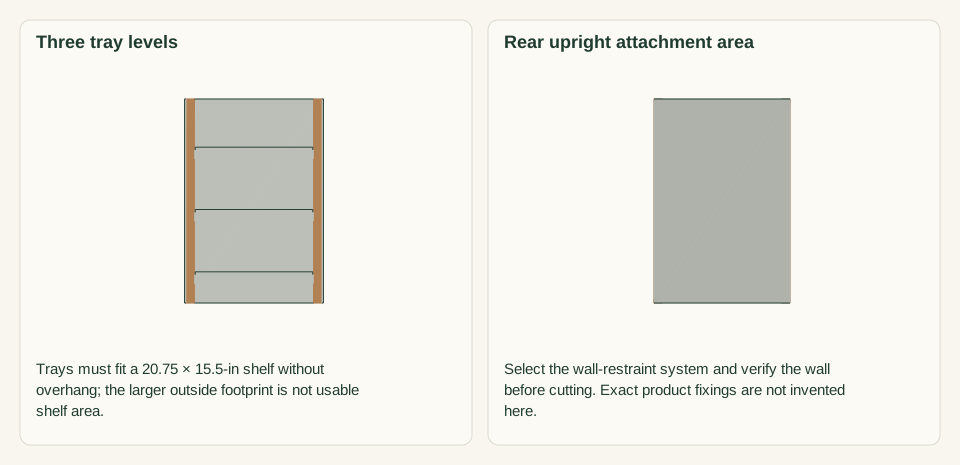
Scroll or swipe the enlarged drawing to read its dimensions. Choose Fit to see the whole drawing again.
Use the completed rack only as a size reference while choosing trays and a restraint location.
Check: Trays fit and two safe restraint attachment positions are identified.
- 02
Cut four matching uprights
Cut four 36-inch uprights from actual 1.5-inch-square stock and label front/rear pairs. Reject stock with knots or splits at the shelf fixing elevations.
Close-up · Whole model shows the complete part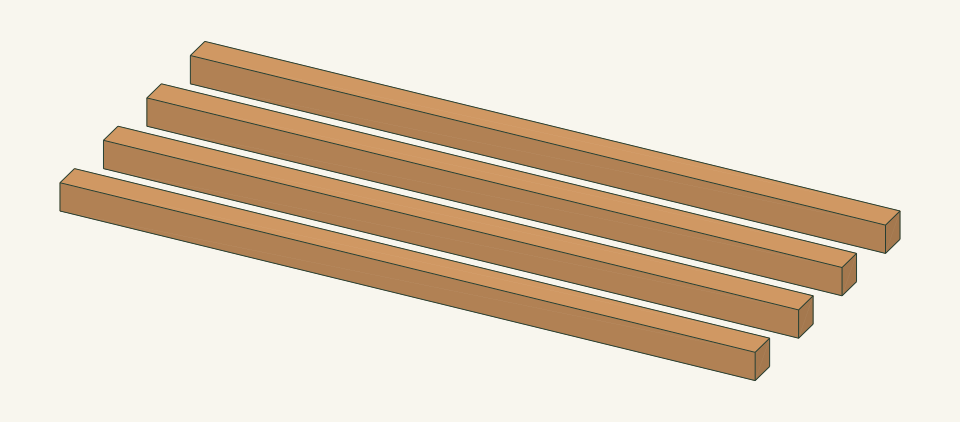
Loading the 3D view…
Drag to turn. Pinch or use + / − to zoom. The written step covers workholding and tool use.
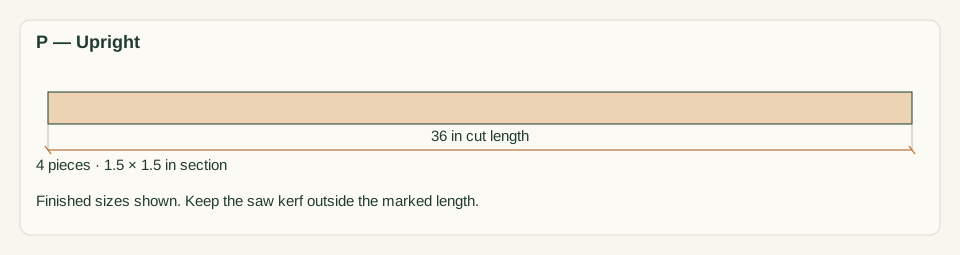
Scroll or swipe the enlarged drawing to read its dimensions. Choose Fit to see the whole drawing again.
Cut four matching uprights, kept separate for inspection and labeling.
Check: All four posts stand at the same height on a flat surface.
- 03
Cut the six bearers and three shelf blanks
Cut six 21-inch bearers and three 20.75 × 15.5-inch rectangular shelves. Use actual 1.5-inch-square bearer stock and 0.5-inch plywood. Lay out kerf and trim on the purchased sheet first. These shelves have no notches.
Close-up · Whole model shows the complete part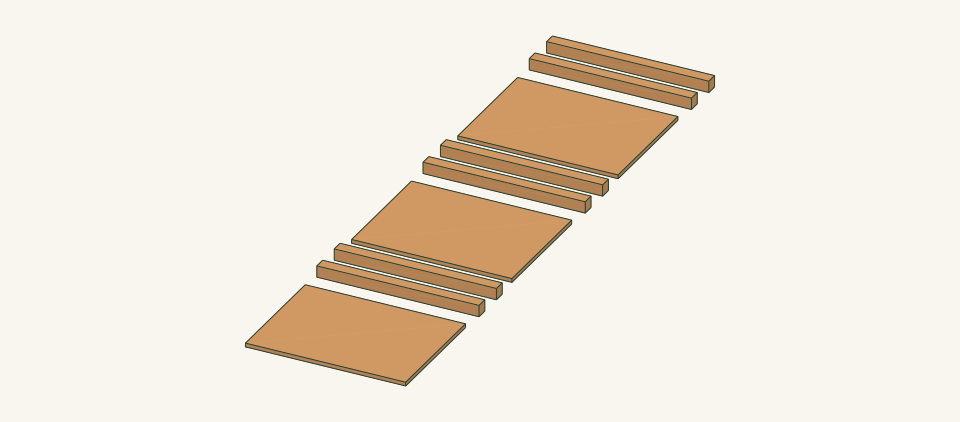
Loading the 3D view…
Drag to turn. Pinch or use + / − to zoom. The written step covers workholding and tool use.
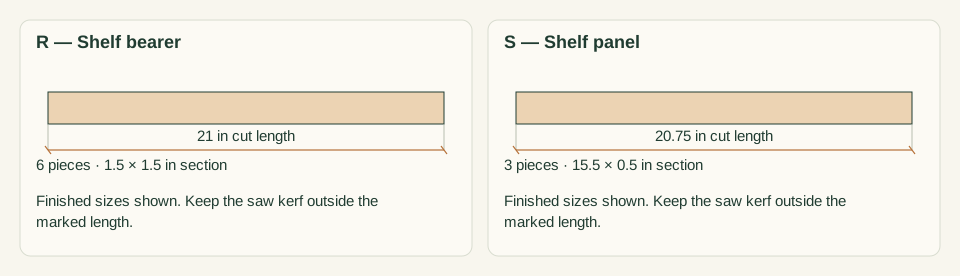
Scroll or swipe the enlarged drawing to read its dimensions. Choose Fit to see the whole drawing again.
Cut six bearers and three rectangular shelves. There are no corner notches in this revised shelf design.
Check: No shelf is short because a saw kerf was omitted from the purchase layout.
- 04
Check the clear front opening
Clamp two posts and one 21-inch bearer as a temporary front mockup. Hold an empty 20.75-inch-wide shelf horizontally above the bearer and slide it through the opening. It must have 1/8-inch clearance at each post. Match all three shelves to this rectangle; round only sharp edges, not the support faces.
Close-up · Whole model shows the complete part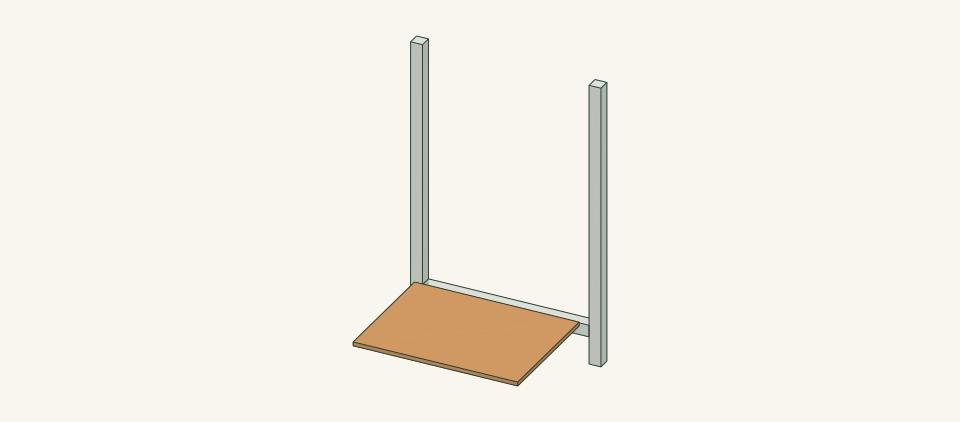
Loading the 3D view…
Drag to turn. Pinch or use + / − to zoom. The written step covers workholding and tool use.
Scroll or swipe the enlarged drawing to read its dimensions. Choose Fit to see the whole drawing again.
Trial one shelf through a mock front opening before making the case rigid. Its separation in the scene illustrates the sliding direction.
Check: Every shelf passes straight through the 21-inch opening without notches, bending or forced posts.
- 05
Mark three common shelf elevations
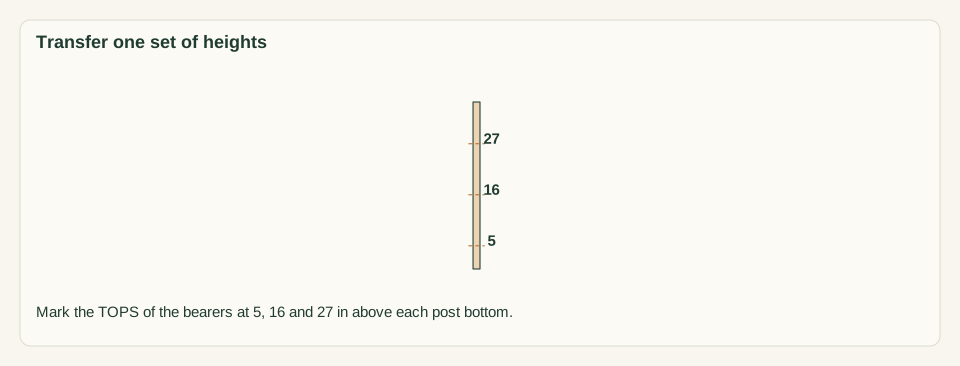
Mark bearer top faces at 5, 16 and 27 inches on every upright from one bottom starting edge. Clamp the front pair around their three 21-inch bearers; repeat for the rear pair.
Close-up · Whole model shows the complete part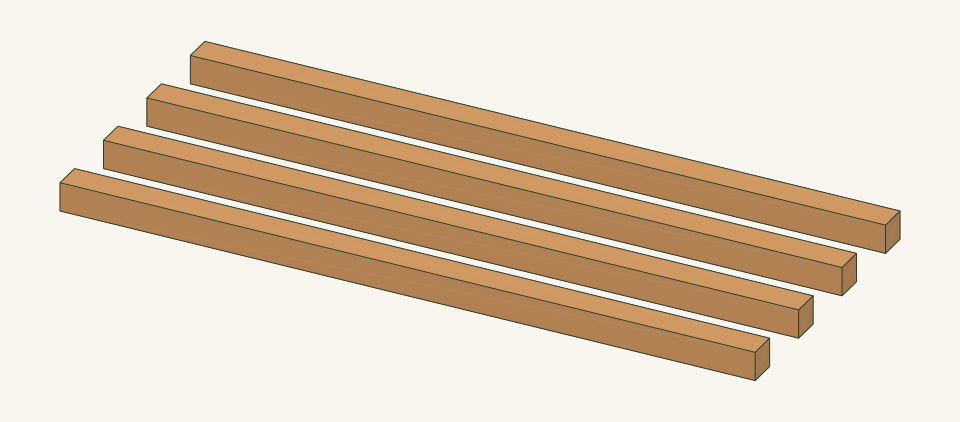
Loading the 3D view…
Drag to turn. Pinch or use + / − to zoom. The written step covers workholding and tool use.
Scroll or swipe the enlarged drawing to read its dimensions. Choose Fit to see the whole drawing again.
Use the same bottom reference on all four posts. These marks locate bearer tops, not screw centers.
Check: Front and rear bearer tops match at each of the three elevations.
- 06
Locate and fasten all six bearers
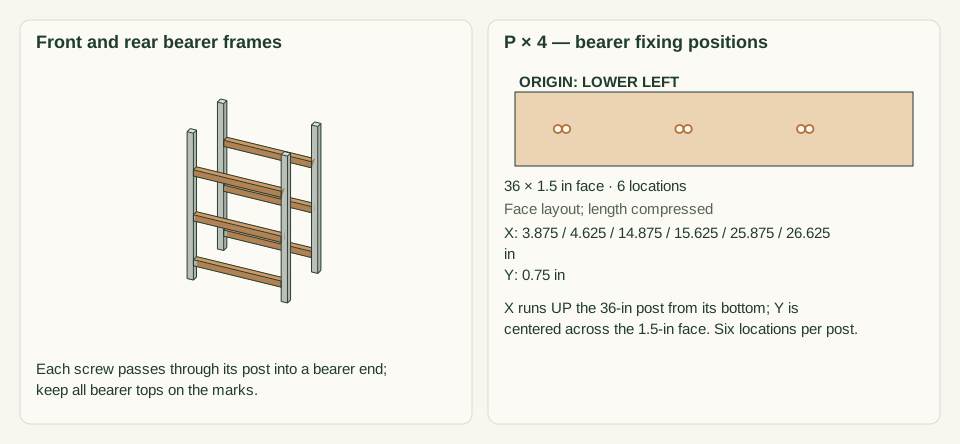
Clamp each bearer with its top at 5, 16 or 27 inches from the post bottom. Mark two holes through each post into the bearer end, centered across the 1.5-inch depth at 0.75 inch. Heights are 0.375 and 1.125 inches above the bearer lower edge. Drill clearances through posts only and pilots into bearer ends; fit 24 #10 × 2.5-inch screws.
Close-up · Whole model shows the complete part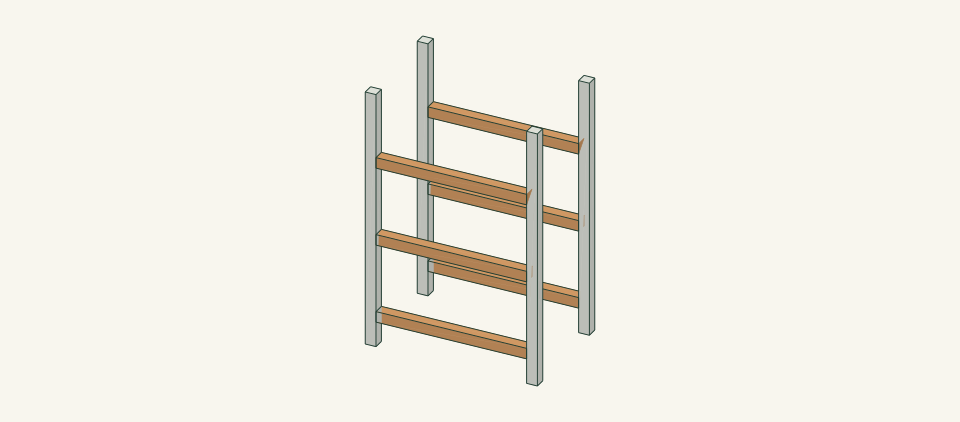
Loading the 3D view…
Drag to turn. Pinch or use + / − to zoom. The written step covers workholding and tool use.
Scroll or swipe the enlarged drawing to read its dimensions. Choose Fit to see the whole drawing again.
Fasten six bearers between the posts. Shelves and brace panels are not present yet.
Check: Each screw passes 1.5 inches of post and enters its bearer 1 inch; no bearer end is split.
- 07
Fit rear and side bracing
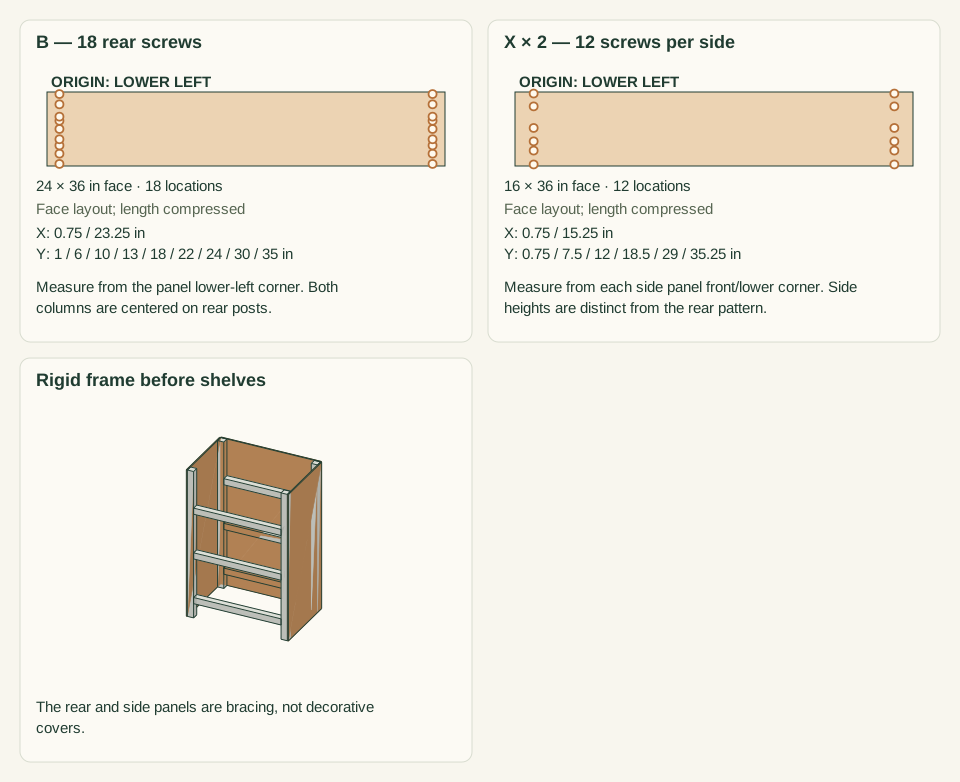
Cut the 24 × 36-inch rear panel and two 16 × 36-inch side panels from the listed 0.25-inch plywood. Set the outside post width 24 inches and depth 16 inches. Clamp the back. Its two screw columns are 0.75 and 23.25 inches from its left edge; mark heights 1, 6, 10, 13, 18, 22, 24, 30 and 35 inches. Fit 18 #6 × 1-inch screws into rear posts. Side panels get columns 0.75 and 15.25 from their front edge, heights 0.75, 7.5, 12, 18.5, 29 and 35.25:12 screws per side into posts.
Close-up · Whole model shows the complete part
Loading the 3D view…
Drag to turn. Pinch or use + / − to zoom. The written step covers workholding and tool use.
Scroll or swipe the enlarged drawing to read its dimensions. Choose Fit to see the whole drawing again.
Add the rear and both side panels. Their screws enter the posts; no panel screw targets an open bay.
Check: All three panels are fixed to wood; outside including panels is 24.5 × 16.25 inches.
- 08
Secure against tipping
Fit two furniture restraints to the rear uprights and identified wall framing exactly as their instructions require. Account for pipes and wiring before drilling. Do not substitute short drywall screws or attach to an unknown substrate.
Close-up · Whole model shows the complete part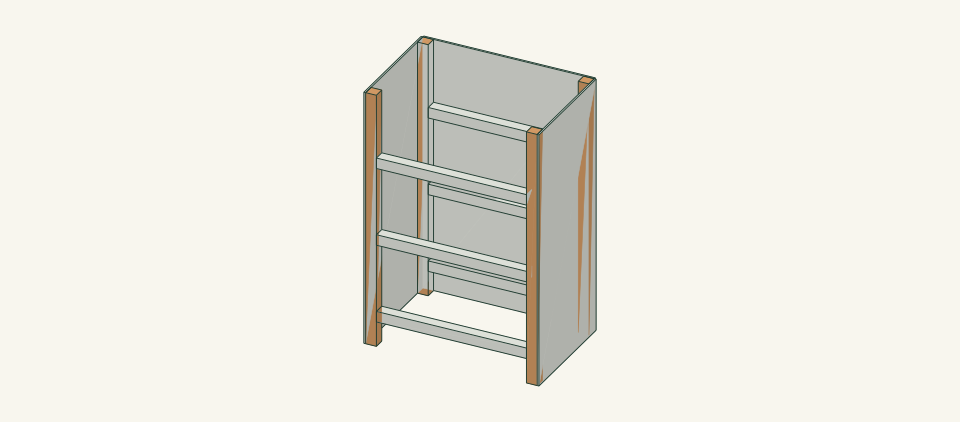
Loading the 3D view…
Drag to turn. Pinch or use + / − to zoom. The written step covers workholding and tool use.
Scroll or swipe the enlarged drawing to read its dimensions. Choose Fit to see the whole drawing again.
Attach the selected restraints to the rear uprights and verified wall. The exact restraint product controls its holes and hardware.
Check: Both restraints are fitted to the selected system; the rack cannot be used unrestrained.
- 09
Slide in the empty shelves
Slide each shelf HORIZONTALLY through the front, just above its bearers, then lower it into place. Center it at 1/8-inch clearance from each front post. Set its front 0.25 inch behind the rack front; its rear is also 0.25 inch clear. It bears 1.25 inches across the front and rear bearers. Add empty catch trays only after checking the support.
Close-up · Whole model shows the complete part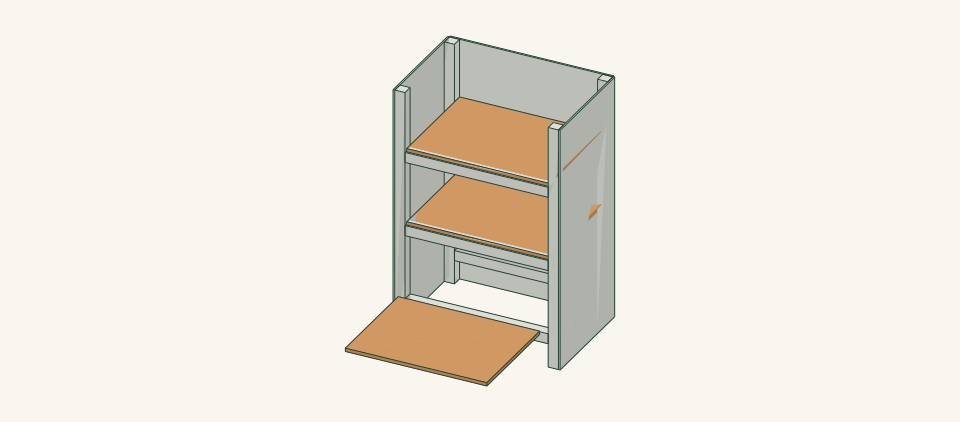
Loading the 3D view…
Drag to turn. Pinch or use + / − to zoom. The written step covers workholding and tool use.
Scroll or swipe the enlarged drawing to read its dimensions. Choose Fit to see the whole drawing again.
Slide each empty shelf in through the front, then lower it onto both bearers. The first shelf is displaced only to explain the path.
Check: All three shelves slide out independently when empty; no shelf has to pass down through higher bearers.
- 10
Arrange plants and inspect after watering
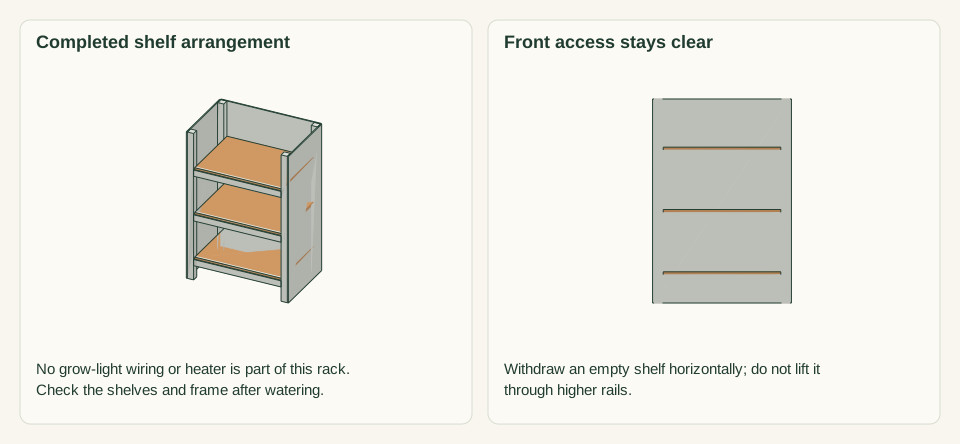
Place small trays low first and keep all water in their catch trays. Move trays separately rather than dragging a loaded shelf. Inspect for sag, looseness, trapped water and unequal feet after each watering at first.
Close-up · Whole model shows the complete partLoading the 3D view…
Drag to turn. Pinch or use + / − to zoom. The written step covers workholding and tool use.
Scroll or swipe the enlarged drawing to read its dimensions. Choose Fit to see the whole drawing again.
The three shelves are now supported inside the restrained rack. Water and inspect trays separately before returning them.
Check: No water reaches wall fixings and no shelf or frame shows movement.


05 / Keep it sound
Care
After the build
- This guide contains no electrical installation. Keep extension leads, heaters and unsupported grow-light hardware out of the rack.
- Take trays to a suitable watering area when possible, then let them drain before returning them to dry catch trays.
Check it each season
- Inspect connections and hand-contact edges before use. Unload before tightening or replacing parts; replace a cracked member rather than adding a screw beside the crack.
- Brush off debris, wipe only as needed and dry with air around the joints. Store dry when the item is not in use.
If something looks wrong
- Shelf binds at a post
- Empty the shelf and slide it out through the front. Check its 20.75-inch width, the 21-inch opening and the frame squareness; do not spread posts or cut unplanned notches.
- Rack leans when a tray moves
- Unload, verify the wall restraints and inspect the rear panel before further use.
- Plywood edge swells
- Stop wetting it and replace a delaminated panel with the same specified section.
- Upper seedlings shade lower trays
- Rearrange compatible plant heights and light exposure rather than mounting improvised wiring.
Keep exploring