Garden workstations · Guide 78
Build a Removable Potting-Bench Insert
A removable potting-tub cradle that catches loose mix without cutting a hole through the workbench.
01 / See the shape
View the project
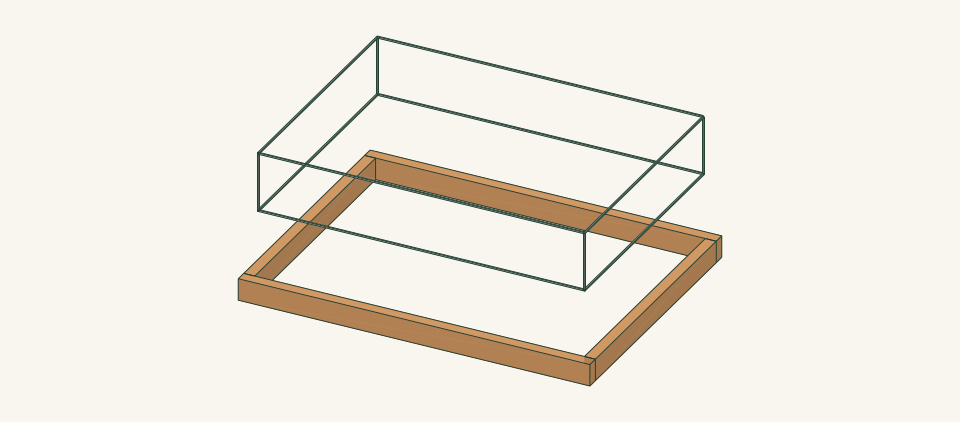
Loading the 3D view…
Drag to turn. Pinch or use + / − to zoom. The written step covers workholding and tool use.
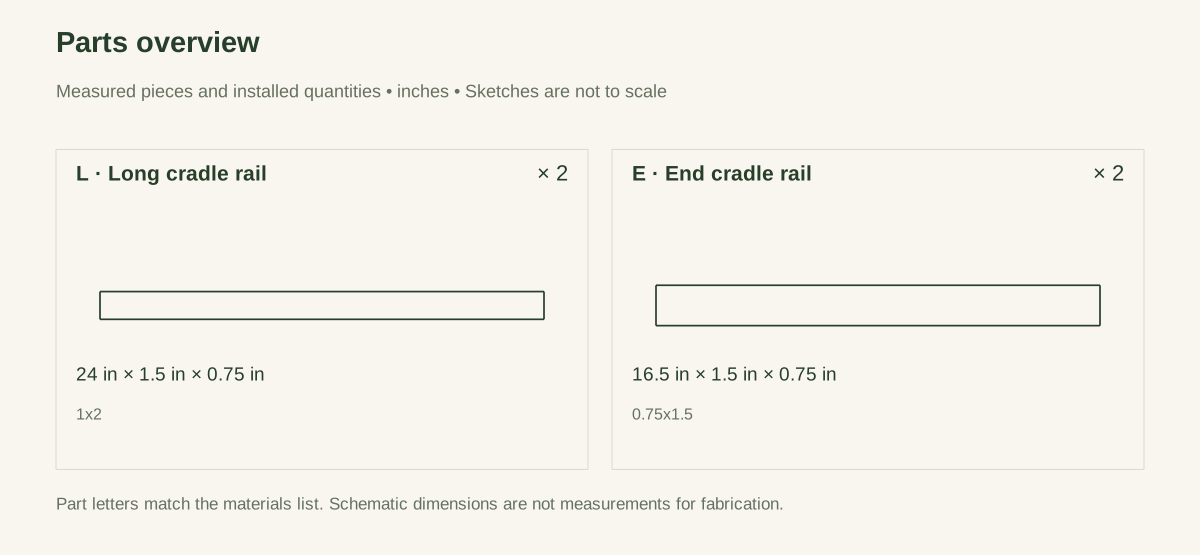
Scroll or swipe the enlarged drawing to read its dimensions. Choose Fit to see the whole drawing again.
Build a Removable Potting-Bench Insert. Check the dimensions and build steps before cutting.
02 / Plan your build
Before you start
This insert sits on top of a sound bench. A lift-out tub takes the dirt and moisture, while a low wooden cradle keeps it from sliding during light potting. The tub floor is fully supported by the bench; its rim is not asked to carry a suspended wet load.
Where it goes
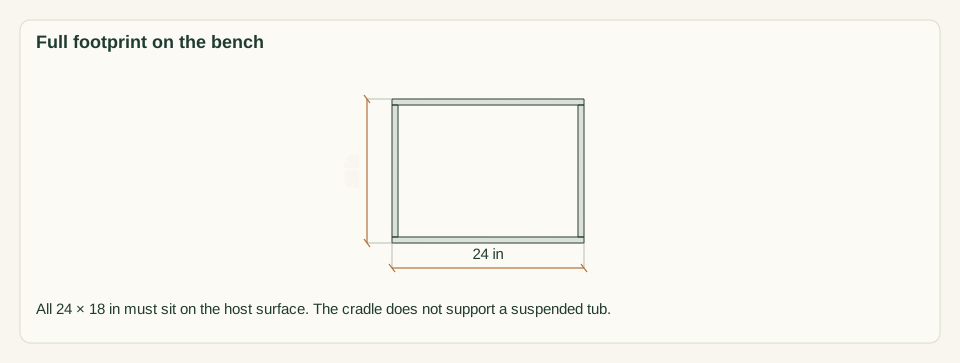
A sound level bench that supports the complete 24 × 18-inch cradle and the selected tub; no unsupported overhang.
Footprint: 24 × 18 in frame size; allow room around it to work and for anything that projects.
What to expect
Measure accurately, make supported square cuts and drill clamped joints. Plan 2–3 hours plus actual tub selection.
A planning estimate for the hands-on work, once the materials are bought and the tools are set up. It has not been timed on a finished build.
Check the spot
- A sound level bench that supports the complete 24 × 18-inch cradle and the selected tub; no unsupported overhang.
- Measure the usable stock before marking. Keep the assembly area flat and large enough to clamp the work without reaching across a moving cutter.
Stop and check first if…
- Stop if a part splits, a fixing strips, or the assembled object rocks. Unload it before opening a joint.
- Do not substitute an unknown material section or make the object taller or wider without checking every affected part and joint.
Work safely
- Clamp each narrow rail before drilling; keep the free hand out of the drill path. Support cuts so the short end cannot fall against the blade.
- Empty the tub before lifting. Lift the tub and wooden cradle separately; never lift a wet load by the cradle rails. Keep wet mix off the walking floor.
Budget
We have not put a price on this one yet. Lumber and hardware prices change by store and season, so price the list under What you need at your local supplier before you buy.
03 / Gather and cut
What you need
L — Long cradle rail
2 pieces
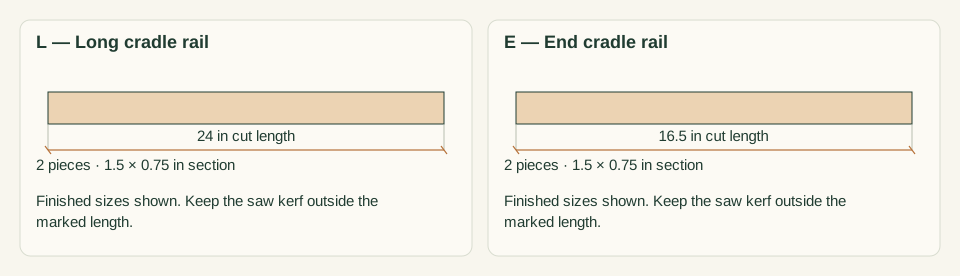
Untreated surfaced 1 × 2; actual 0.75 × 1.5 in. Buy one nominal 1 × 2 × 8-ft board for ALL four rails: two 24-inch L pieces and two 16.5-inch E pieces.
Measure your boards before cutting. Build to the finished sizes written here, not the nominal lumber label.
E — End cradle rail
2 pieces
Same 0.75 × 1.5 stock. Cut from the same board listed for L; no second board is needed.
Measure your boards before cutting. Build to the finished sizes written here, not the nominal lumber label.
C — Removable potting tub
1 piece
Clean rigid plastic potting tub, no larger than 22.25 × 16.25 in at its widest point, INCLUDING the rim; flat floor supported by the bench. One tub measured before assembling the cradle.
Measure the entire tub, including handles and any flared rim. Choose an empty tub that lifts straight out with room at every side.
Corner screws
8 items
#6 × 1.5-in corrosion-resistant wood screws Purchase at least 8; keep spare hardware separate from the installed count.
Use one consistent product and follow its pilot and driving instructions.
Bench protection pads
4 items
Four 0.5 × 1-in non-marking adhesive grip pads, at most 1/16 in thick Buy one pack with at least four pads compatible with the bench finish.
Stick only to the wood rails. The tub floor must stay directly on the bench.
Label
1 item
One water-resistant potting-only label Buy one label or cut one from a suitable label sheet.
Apply to the dry outside of the tub, not its working surface.
Cut list
| Piece | How many | Cut length | Note |
|---|---|---|---|
| L — Long cradle rail | 2 | 24 × 1.5 × 0.75 in | Finished length × width × thickness; square ends unless the detail says otherwise. |
| E — End cradle rail | 2 | 16.5 × 1.5 × 0.75 in | Finished length × width × thickness; square ends unless the detail says otherwise. |
Tools
- Tape or rule, square and sharp pencil
- Clamps, a flat bench and sacrificial backing
- Suitable guarded saw for the specified stock
- Drill/driver, depth stop and bits matched to the chosen screws
- Fine abrasive and a dust brush
- Scissors for pads and label; a straightedge for checking the tub floor
Protective gear
- Eye protection during cutting and drilling
- Hearing protection and dust collection appropriate to the actual tools
- Closed footwear; keep loose clothing and gloves away from rotating cutters
04 / Put it together
Build steps
- 01
Select a tub before cutting
Measure the whole empty tub, including its rim, handles and any flare. Its widest length must be at most 22.25 inches and its width at most 16.25 inches. Stand it on the bench: the entire intended floor-support area must rest flat. Reject a rim-hung or rocking tub.
Close-up · Whole model shows the complete part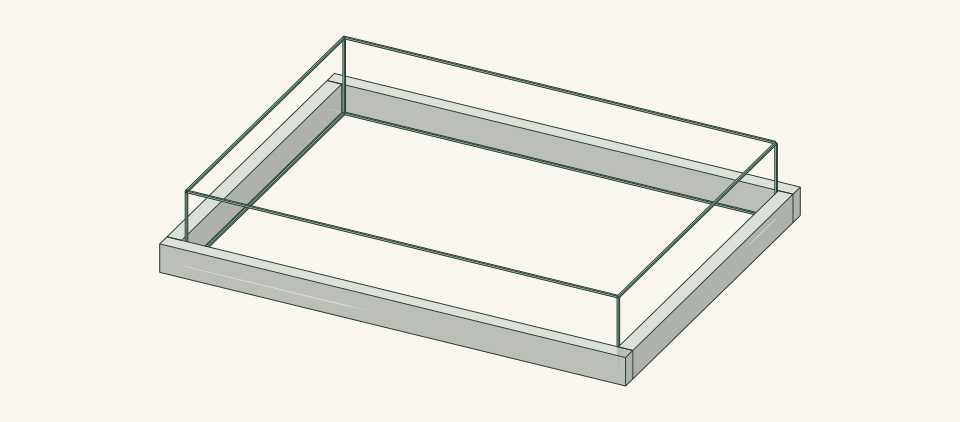
Loading the 3D view…
Drag to turn. Pinch or use + / − to zoom. The written step covers workholding and tool use.
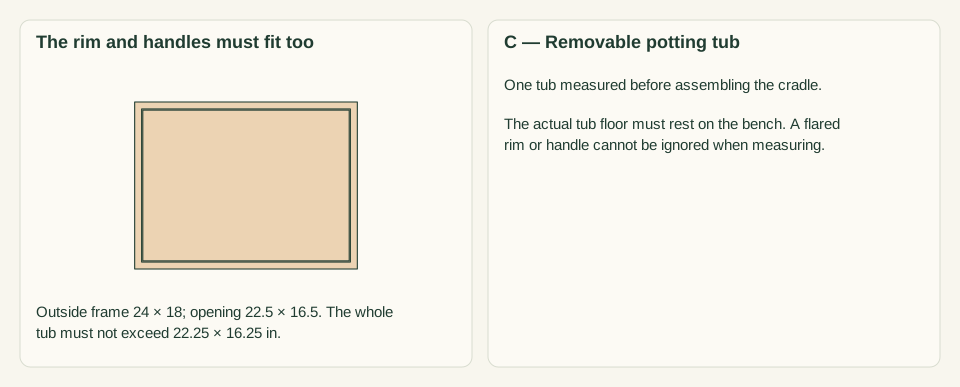
Scroll or swipe the enlarged drawing to read its dimensions. Choose Fit to see the whole drawing again.
Measure the whole purchased tub before cutting. The thin outline is a maximum fit envelope, not a modeled tub or a rim-hung design.
Check: The entire tub fits through a 22.5 × 16.5-inch opening and stands on its floor.
- 02
Check the host bench
Measure the usable work surface and inspect its top, supports and joints. The full 24 × 18 cradle must sit within it, with no unsupported edge or wall cutout. Do not cut the bench to make the tub appear recessed.
Close-up · Whole model shows the complete part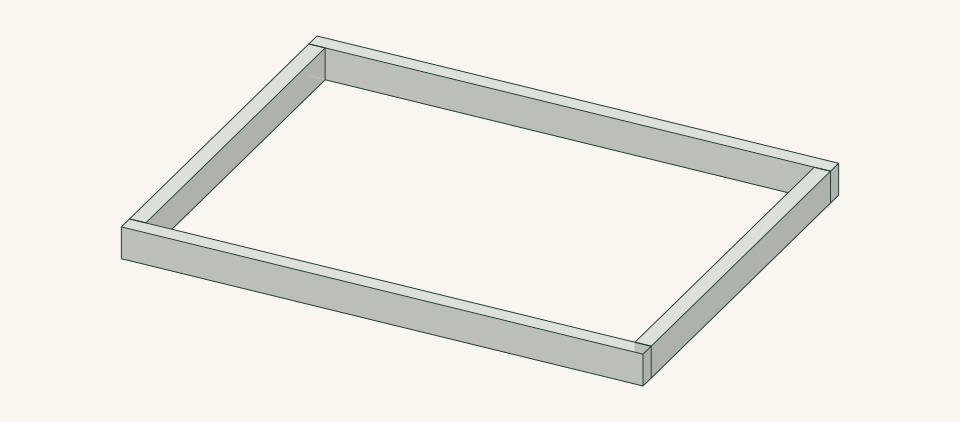
Loading the 3D view…
Drag to turn. Pinch or use + / − to zoom. The written step covers workholding and tool use.
Scroll or swipe the enlarged drawing to read its dimensions. Choose Fit to see the whole drawing again.
Check that the host bench supports the complete cradle footprint without cutting into its surface.
Check: The host surface is level, sound and larger than the complete insert.
- 03
Cut four cradle rails
Cut two 24-inch long rails and two 16.5-inch ends from actual 0.75 × 1.5 stock. Mark bottom edges. Keep saw kerf outside the finished lengths and match opposing pieces before drilling.
Close-up · Whole model shows the complete part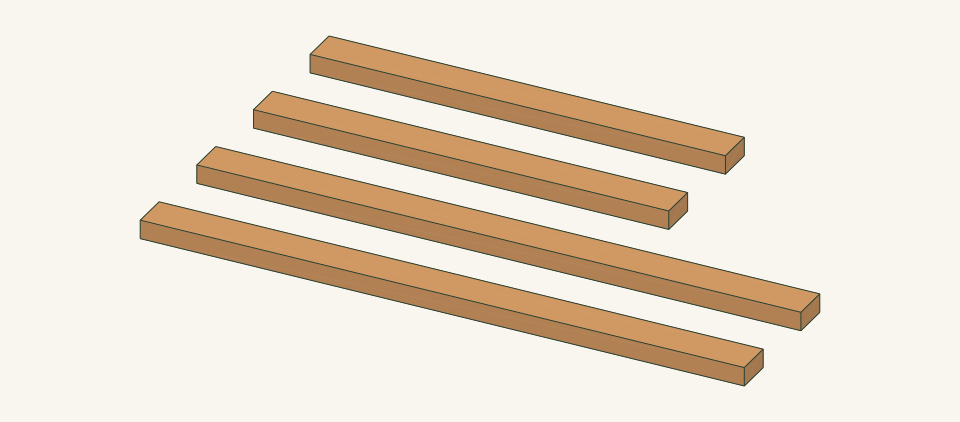
Loading the 3D view…
Drag to turn. Pinch or use + / − to zoom. The written step covers workholding and tool use.
Scroll or swipe the enlarged drawing to read its dimensions. Choose Fit to see the whole drawing again.
Cut two L rails and two shorter E rails. They remain loose and labeled until the ring is clamped.
Check: Both pairs match and the rail section is the stated actual size.
- 04
Clamp and measure the ring
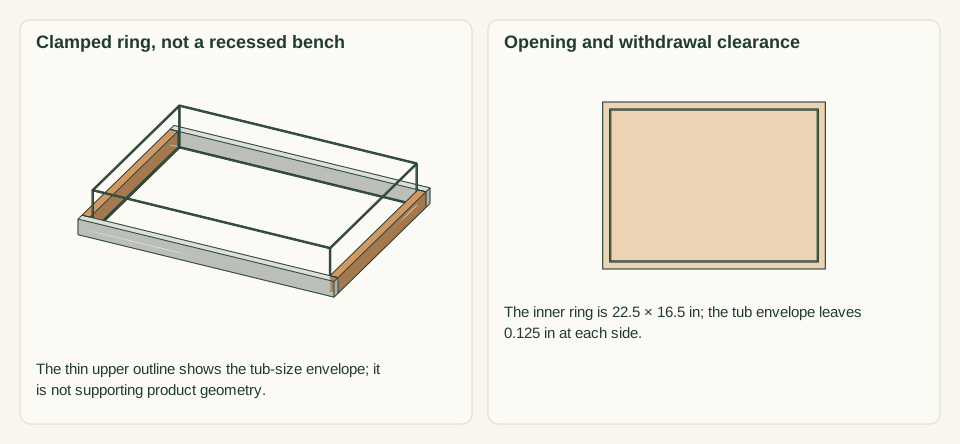
Fit E between L on a flat surface. Check 24 × 18 outside and 22.5 × 16.5 inside. Place the empty tub in the opening to confirm the entire withdrawal path before fixing the joints.
Close-up · Whole model shows the complete part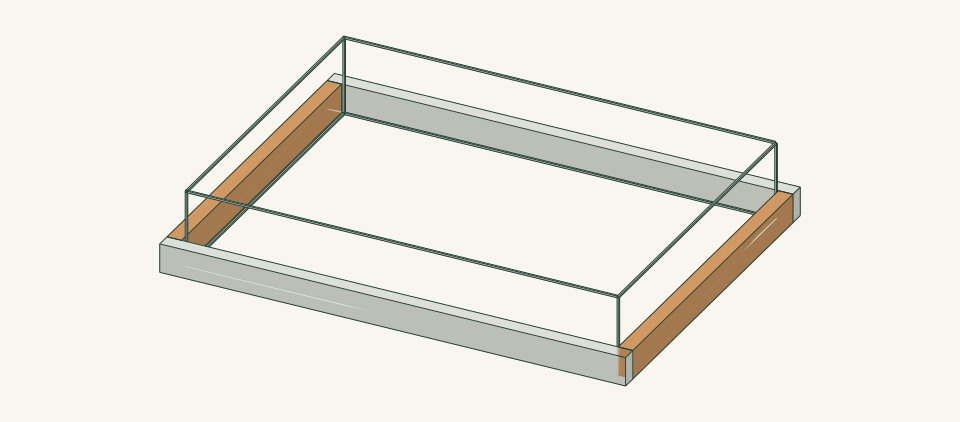
Loading the 3D view…
Drag to turn. Pinch or use + / − to zoom. The written step covers workholding and tool use.
Scroll or swipe the enlarged drawing to read its dimensions. Choose Fit to see the whole drawing again.
Fit E between L and check the opening against the actual empty tub before fixing any corners.
Check: The tub drops in and lifts out freely without pushing the ring apart.
- 05
Mark the corner screw paths
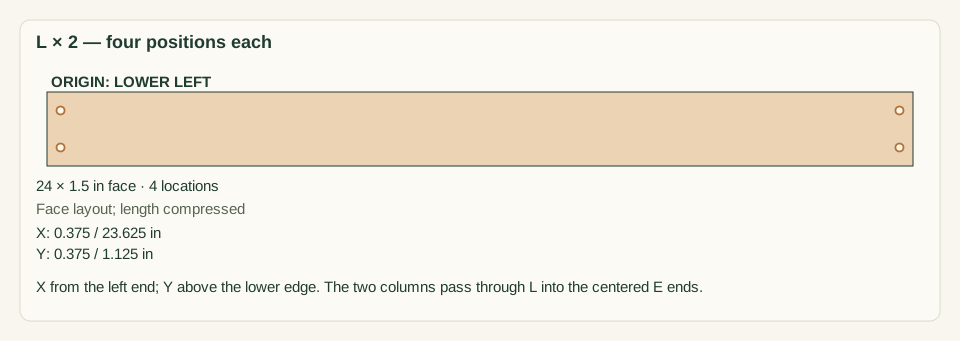
On each L face mark screw lines 0.375 inch from the ends, at 0.375 and 1.125 above the bottom. Each path must enter the center thickness of the corresponding E piece. Inspect for edge knots.
Close-up · Whole model shows the complete part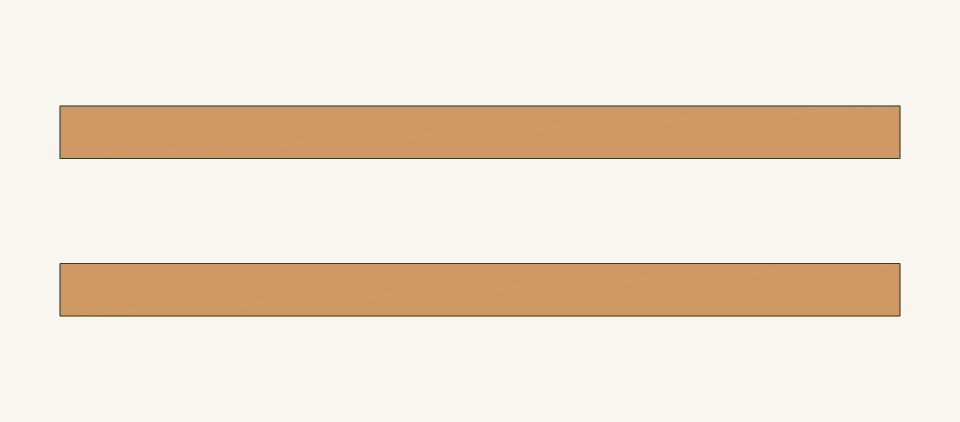
Loading the 3D view…
Drag to turn. Pinch or use + / − to zoom. The written step covers workholding and tool use.
Scroll or swipe the enlarged drawing to read its dimensions. Choose Fit to see the whole drawing again.
Mark the corner paths on the two loose long rails. The shorter end rails are the receiving pieces.
Check: Eight positions are marked and all paths enter sound receiving wood.
- 06
Drill and fasten under clamps
Use clearance holes through L only and product-matched receiving pilots into E. Lightly countersink for flush heads. Drive eight #6 screws without crushing the rail, checking squareness as you go.
Close-up · Whole model shows the complete part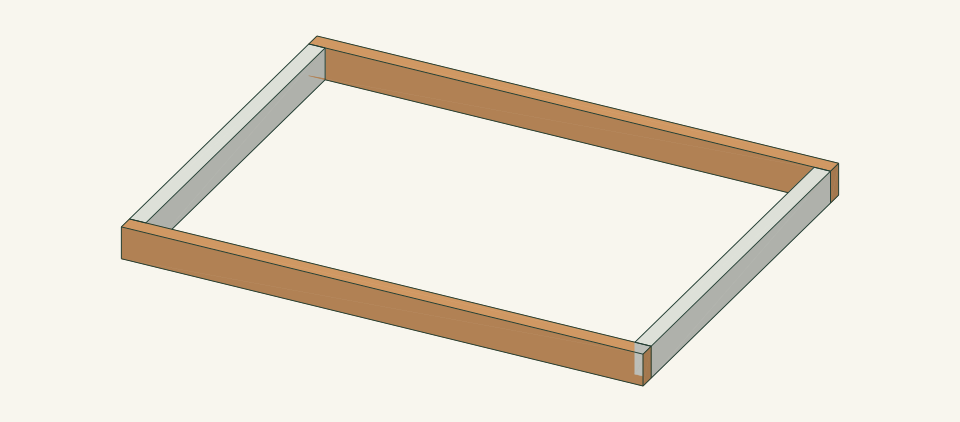
Loading the 3D view…
Drag to turn. Pinch or use + / − to zoom. The written step covers workholding and tool use.
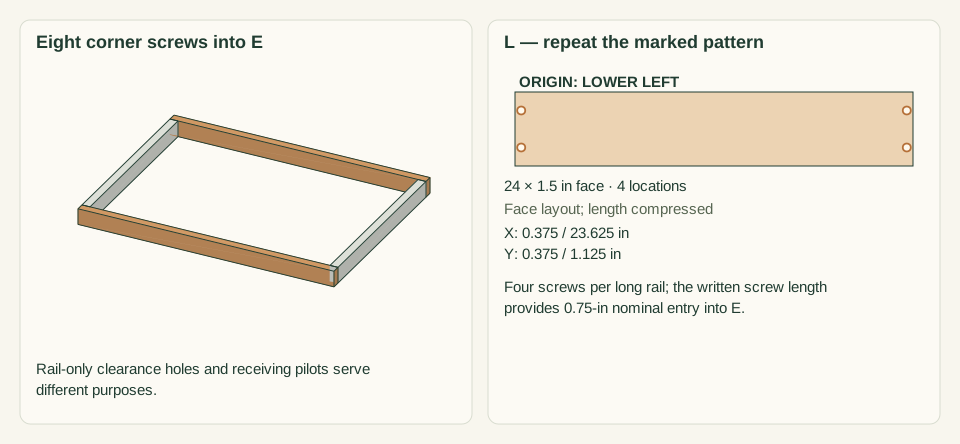
Scroll or swipe the enlarged drawing to read its dimensions. Choose Fit to see the whole drawing again.
Fasten only the clamped wood corners. No screw enters the tub or the bench.
Check: No split, proud head or twisted corner remains after unclamping.
- 07
Smooth the lift-out opening
Ease internal edges by hand without changing the fit dimensions. Brush away dust and pass a cloth around the inside. Round only sharp hand-contact edges, not the joint bearing faces.
Close-up · Whole model shows the complete part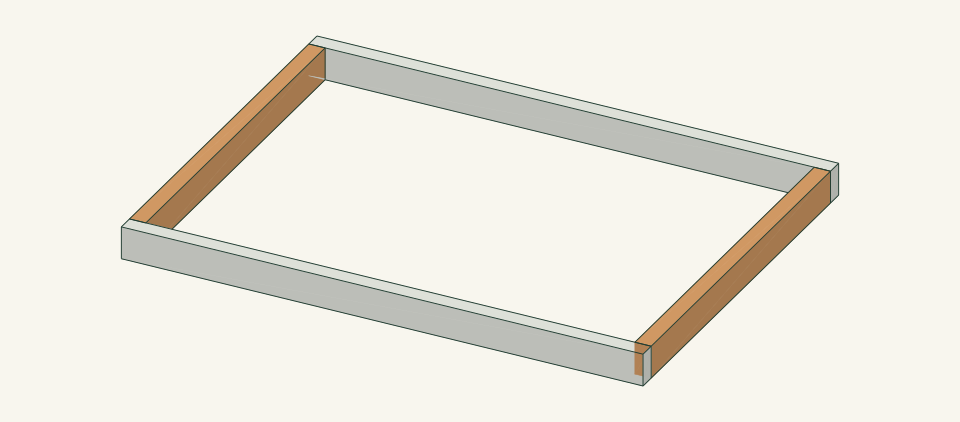
Loading the 3D view…
Drag to turn. Pinch or use + / − to zoom. The written step covers workholding and tool use.
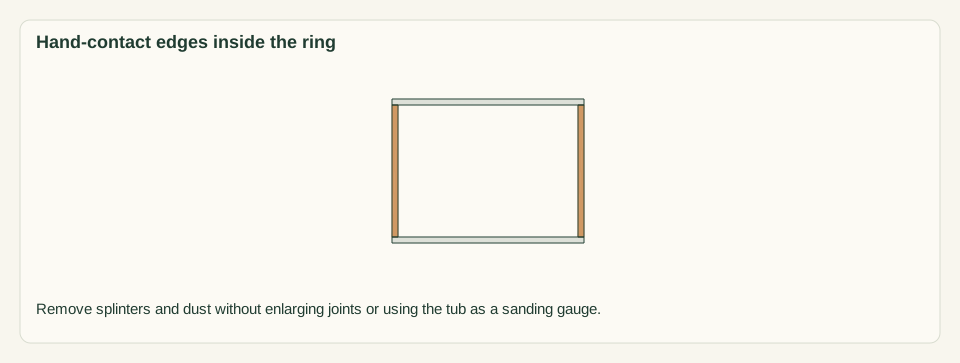
Scroll or swipe the enlarged drawing to read its dimensions. Choose Fit to see the whole drawing again.
Ease the inside lift-out edges while preserving the measured opening and the corner bearing faces.
Check: No edge can scratch or catch the tub during removal.
- 08
Place four thin grip pads
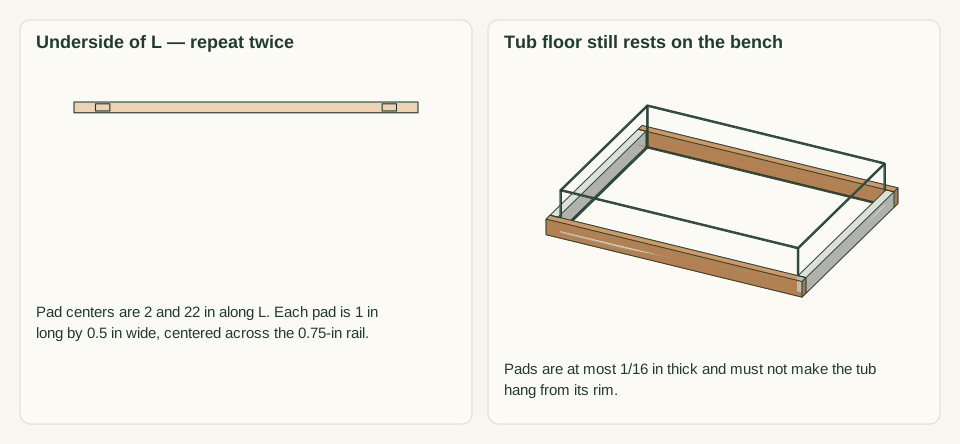
On the underside of each long rail, mark centers 2 and 22 inches from its left end, halfway across its 0.75-inch thickness. Center one 0.5 × 1-inch pad at each mark, its long direction along the rail. Press on four thin pads. Set the empty tub inside; its floor must still rest on the bench, not hang from the rim.
Close-up · Whole model shows the complete part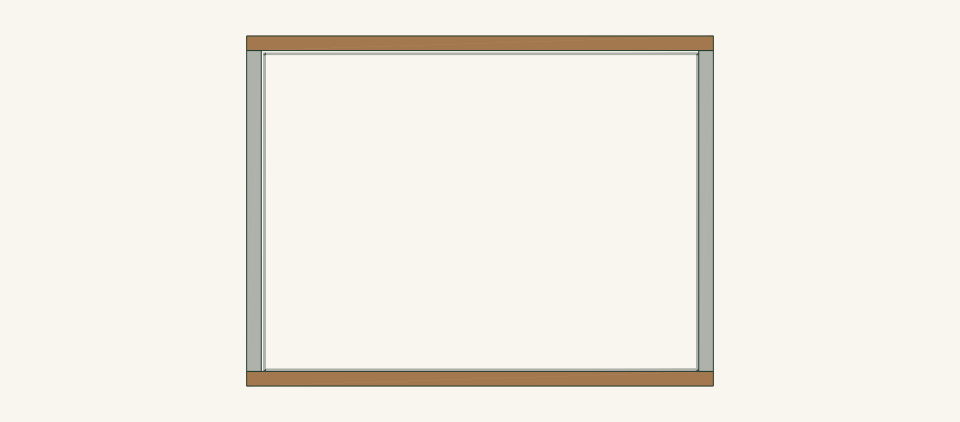
Loading the 3D view…
Drag to turn. Pinch or use + / − to zoom. The written step covers workholding and tool use.
Scroll or swipe the enlarged drawing to read its dimensions. Choose Fit to see the whole drawing again.
Fit two thin adhesive pads beneath each long rail. The four location symbols are pad centers, not screw holes.
Check: All four pads sit beneath rails and the tub remains floor-supported.
- 09
Set a modest working batch
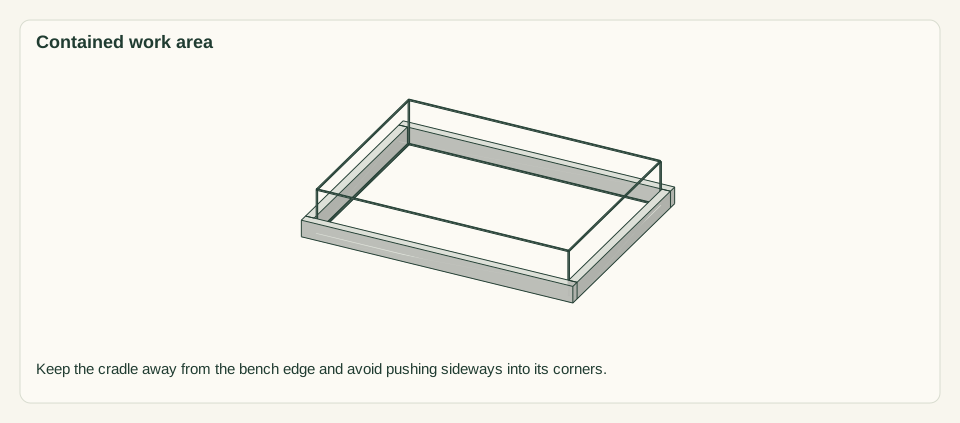
Label the tub for potting only. Put a small batch of mix in it and check access for the trowel and empty pots. Keep the cradle away from the bench edge and avoid pushing sideways against its corners.
Close-up · Whole model shows the complete part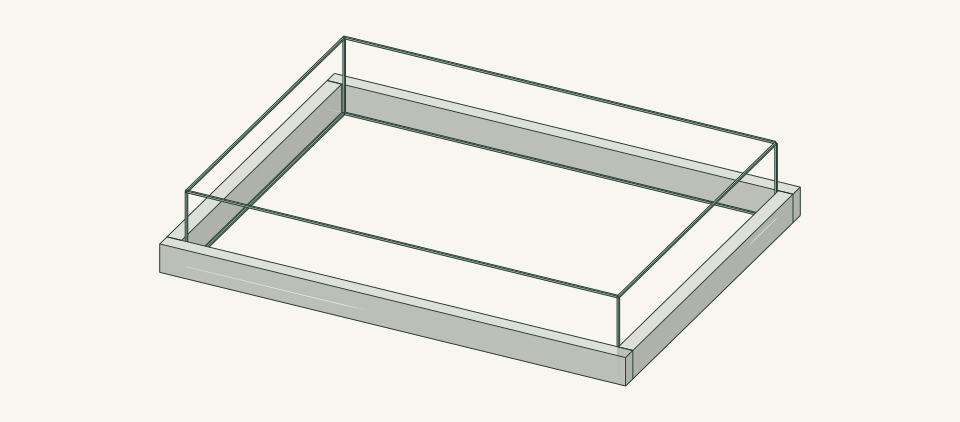
Loading the 3D view…
Drag to turn. Pinch or use + / − to zoom. The written step covers workholding and tool use.
Scroll or swipe the enlarged drawing to read its dimensions. Choose Fit to see the whole drawing again.
Set the actual tub inside the finished cradle for a small contained potting batch. The outline shows fit only, not a rated load.
Check: Mix stays in the tub and the cradle does not slide in ordinary light use.
- 10
Empty and remove after potting
Remove loose mix before lifting the tub. Clean and dry it separately, then lift the empty cradle to inspect the bench underneath. Store both where trapped water cannot collect.
Close-up · Whole model shows the complete partLoading the 3D view…
Drag to turn. Pinch or use + / − to zoom. The written step covers workholding and tool use.
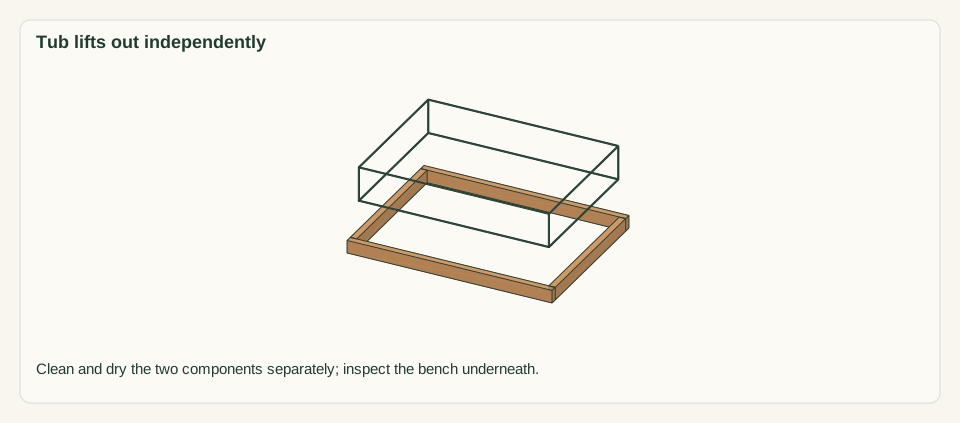
Scroll or swipe the enlarged drawing to read its dimensions. Choose Fit to see the whole drawing again.
Empty first, then lift the tub and the wood cradle separately. The raised outline explains withdrawal rather than an installed height.
Check: Bench and cradle contact areas are dry and easy to inspect.


05 / Keep it sound
Care
After the build
- The tub is the replaceable wet component. Replace it with a measured compatible unit rather than opening or stretching the cradle.
- Never lift the cradle with the filled tub inside; the corner screws are not carrying handles.
Check it each season
- Inspect connections and hand-contact edges before use. Unload before tightening or replacing parts; replace a cracked member rather than adding a screw beside the crack.
- Brush off debris, wipe only as needed and dry with air around the joints. Store dry when the item is not in use.
If something looks wrong
- Tub rim catches
- Measure the entire tub including its rim and handles; choose one within the stated maximum size rather than forcing it.
- Tub hangs from its lip
- Remove pads or change the tub so its bottom bears directly on the bench.
- Cradle slides
- Stop and choose compatible non-marking grip pads; keep the bench level.
- Bench stays damp underneath
- Empty and remove the assembly after use, dry both surfaces and inspect for finish damage.
Keep exploring